1. Choosing the Right Winter Camping Destination
Winter camping in the U.S. offers a wide variety of experiences, from snowy mountain adventures to quiet forest escapes. Whether youre a seasoned camper or just starting out, choosing the right destination is key to having a safe and enjoyable trip.
Popular U.S. Winter Camping Spots
From well-known national parks to remote backcountry areas, here are some popular winter camping spots across the United States:
| Location | State | Highlights | Skill Level |
|---|---|---|---|
| Yellowstone National Park | Wyoming/Montana/Idaho | Geysers, wildlife, snowshoeing | Intermediate to Advanced |
| Mount Hood National Forest | Oregon | Skiing, snow camping, alpine views | Beginner to Intermediate |
| Great Smoky Mountains National Park | Tennessee/North Carolina | Milder winter temps, scenic trails | Beginner |
| Rocky Mountain National Park | Colorado | High elevation camping, winter hiking | Advanced |
| Adirondack Mountains | New York | Icy lakes, deep snow, solitude | Intermediate to Advanced |
How to Choose a Destination That Matches You
Your Skill Level Matters
If you’re new to winter camping, stick with established campgrounds that offer basic amenities and easier access. More experienced campers might prefer backcountry areas where they can test their survival skills and enjoy more solitude.
Know Your Interests
Think about what kind of experience you want. Are you looking for peace and quiet in nature? Do you want to try cross-country skiing or snowshoeing? Different destinations offer different activities—choose one that matches your goals.
Weather and Accessibility
Always check weather conditions and road closures before heading out. Some areas may be inaccessible in heavy snow. Make sure your vehicle can handle winter roads, especially if youre going off the beaten path.
Quick Tips for Picking Your Spot:
- Research ahead: Look at maps, reviews, and park websites.
- Avoid high altitudes if youre not acclimated: Altitude sickness is real.
- Select a spot with emergency services nearby: Especially important for first-timers.
- Check permit requirements: Some parks need reservations even in winter.
- Think about travel time: Dont plan too far unless youre prepared for a long drive in winter conditions.
Selecting the right winter camping destination sets the tone for your entire trip. Take the time to match your location with your comfort level and interests so you can fully enjoy the magic of camping in snowy landscapes.
2. Essential Cold Weather Gear and Clothing
When youre winter camping in the U.S., having the right gear can make or break your trip. Cold temperatures, snow, and wind require specialized equipment to keep you warm, dry, and safe. Heres a detailed breakdown of the essential winter camping gear and clothing you need.
Sleeping Systems Designed for Cold Weather
A good night’s sleep in freezing conditions starts with proper insulation from the cold ground and protection from low temperatures.
| Item | What to Look For |
|---|---|
| Sleeping Bag | Choose a sleeping bag rated at least 10°F lower than expected temperatures. Down insulation offers better warmth-to-weight ratio, but synthetic bags perform better in wet conditions. |
| Sleeping Pad | Use an insulated pad with an R-value of 4 or higher. Double up with a closed-cell foam pad underneath for extra warmth. |
| Liner | A thermal liner can add 10–15°F of warmth and helps keep your sleeping bag clean. |
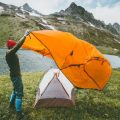
Tents Built for Winter Conditions
Your shelter needs to withstand snow loads and high winds while keeping heat inside.
- Four-season tent: These tents have stronger poles, less mesh, and steeper walls to shed snow more effectively than three-season tents.
- Ventilation: Proper airflow reduces condensation inside the tent. Look for adjustable vents and double-wall construction.
Cold-Weather Cooking Equipment
You’ll burn more calories in cold weather, so it’s important to have a reliable way to prepare hot meals and drinks.
- Stove: Liquid fuel stoves (like white gas) perform better than canister stoves in sub-freezing temps.
- Pots & Utensils: Use lightweight aluminum or stainless steel cookware. Bring extra utensils in case some freeze or break.
- Insulated containers: Thermoses help keep water and food warm longer. Avoid using uninsulated bottles that may freeze overnight.
Dressing for Warmth: Layering System
The key to staying warm and dry is layering. Each layer serves a specific purpose: moisture management, insulation, and protection from the elements.
| Layer | Description |
|---|---|
| Base Layer | This layer wicks sweat away from your skin. Choose synthetic or merino wool materials—never cotton. |
| Mid Layer | This layer traps body heat. Fleece jackets or down/synthetic insulated layers work well here. |
| Outer Layer (Shell) | This layer protects against wind, rain, and snow. Look for waterproof-breathable materials like Gore-Tex or eVent fabric. |
Add-On Accessories You Shouldn’t Skip
- Socks: Wool or synthetic socks are best. Bring extras in case they get wet.
- Mittens/Gloves: Mittens offer better warmth; gloves provide dexterity. Consider wearing thin liner gloves under mittens for flexibility.
A Quick Packing Tip
Avoid overpacking bulky items by choosing gear that compresses easily—like down jackets and sleeping bags—and using stuff sacks or compression bags to save space in your backpack or vehicle.
The right combination of winter-specific gear will not only keep you comfortable but also safe when temperatures drop unexpectedly or storms roll in during your adventure.
3. Winter Camping Skills and Setup Tips
Winter camping in the U.S. offers breathtaking views and unique experiences, but it also demands specific skills to stay safe and comfortable. Whether youre heading to the Rockies, the Adirondacks, or the Sierra Nevada, mastering key cold-weather techniques can make all the difference.
Building a Windbreak
Wind can quickly turn a cozy campsite into a freezing nightmare. Building a windbreak helps block cold gusts and creates a more sheltered environment for cooking and sleeping.
How to Build a Simple Windbreak:
- Use natural materials: Pile up snow, branches, or rocks on the windward side of your tent.
- Create a wall: Stack snow about 2-3 feet high and several feet long for effective protection.
- Position smartly: Set up camp behind terrain features like hills or dense tree lines for added shelter.
Snow Anchoring Your Tent
Standard tent stakes often won’t work in frozen or powdery snow. Proper snow anchoring ensures your tent stays secure during windy conditions.
Snow Anchoring Methods:
| Method | Description |
|---|---|
| Snow Stakes | Specially designed wide stakes that grip snow better than regular ones. |
| Bury Deadman Anchors | Tie your guylines around sticks or stuff sacks filled with snow and bury them horizontally under packed snow. |
| Trees and Rocks | If available, use natural anchors by tying guylines around sturdy trees or large rocks. |
Cooking in Freezing Temperatures
Preparing meals in winter is more challenging due to low temperatures and limited daylight. Use these tips to make it easier and safer:
- Choose the right stove: Liquid fuel stoves (like white gas) perform better than canister stoves in sub-freezing temps.
- Melt snow safely: Always start with a little water in your pot before adding snow to prevent scorching.
- Avoid carbon monoxide: Never cook inside your tent unless you have proper ventilation and equipment rated for indoor use.
- Keep food simple: Opt for easy-to-cook meals that require minimal prep and water (like dehydrated meals or instant soups).
Setting Up Camp on Snow-Covered Terrain
Packing down your campsite properly ensures comfort and safety through the night. Here’s how to do it right:
Campsite Preparation Steps:
- Select a flat area: Avoid avalanche zones or spots directly beneath heavy snow-laden trees.
- Packed base: Use your boots or skis to stomp down the snow where you’ll pitch your tent. Let it sit for 30 minutes to harden before setting up.
- Add insulation: Lay down an insulated ground pad or foam layer under your sleeping pad to prevent heat loss from the cold ground.
- Create pathways: Pack down trails between your tent, kitchen area, and bathroom spot to avoid postholing (sinking into deep snow).
The right techniques can turn a harsh winter landscape into a cozy outdoor retreat. With practice and preparation, youll be ready to enjoy everything winter camping in the U.S. has to offer.
4. Food, Hydration, and Staying Fueled in the Cold
Staying warm and energized during winter camping in the U.S. starts with smart meal planning and hydration. Cold weather burns more calories as your body works to maintain heat, so youll need high-energy foods and a plan to keep water from freezing.
Meal Planning Tips for Winter Camping
When temperatures drop, easy-to-prepare meals become essential. Choose foods that are simple to cook or require minimal prep. Here are some helpful tips:
- Go for hot meals: Warm food helps boost your body temperature. Think soups, stews, and oatmeal.
- Pre-cook at home: Cook hearty meals like chili or pasta beforehand and reheat them at camp.
- Pack for convenience: Instant noodles, dehydrated meals, and foil-packaged foods are lightweight and efficient.
High-Calorie Food Options
Your body needs more fuel in cold weather. Pack calorie-dense snacks that are easy to eat even when youre wearing gloves. Heres a quick guide:
| Food Type | Examples | Calories (approx.) |
|---|---|---|
| Nuts & Nut Butters | Almonds, peanut butter packs | 180–200 per serving |
| Dried Fruits | Raisins, apricots, dates | 100–130 per serving |
| Energy Bars | Clif Bars, RXBARs | 200–250 each |
| Cheese & Meats | Hard cheese, salami sticks | 150–200 per serving |
| Instant Grains | Oatmeal packets, couscous | 150–300 per serving |
Keeping Water from Freezing
Your water supply is just as important as your food. Here’s how to make sure it doesn’t turn into a block of ice overnight:
- Use insulated bottles: Double-walled bottles or bottle insulators help keep liquids from freezing.
- Store bottles upside down: Water freezes from the top; storing upside down keeps the mouthpiece usable.
- Add warm water before bed: Fill bottles with hot (not boiling) water at night to delay freezing.
- Avoid hydration bladders: Tubes tend to freeze quickly—stick with bottles in extreme cold.
Maintaining Energy Levels in the Cold
Your body uses more energy just staying warm in winter conditions. To avoid fatigue and stay active throughout your trip:
Snack Often
Aim to eat small snacks every hour while on the trail. This keeps your metabolism active and your energy levels steady.
Avoid Long Fasts Between Meals
If you go too long without eating, you may start feeling chilled or tired. Eat something before bed to help generate warmth overnight.
Stay Hydrated Even If You Don’t Feel Thirsty
You may not feel thirsty in cold weather, but dehydration can sneak up fast. Drink regularly—even warm herbal teas count!
Pro Tip:
Add electrolyte tablets or drink mixes to your water if you’re doing strenuous activities like snowshoeing or hiking uphill—they help replace lost minerals and keep you going strong.
Packing the right food and staying hydrated aren’t just about comfort—they’re essential for safety and performance during any winter camping adventure across the U.S.
5. Safety Precautions and Emergency Preparedness
Winter camping in the U.S. can be an unforgettable experience, but it also comes with serious risks. Cold temperatures, unpredictable weather, and remote locations all demand extra preparation. Heres what you need to know to stay safe and be ready for emergencies.
Understand Cold-Weather Risks
Being aware of common winter camping dangers is the first step toward staying safe. Here are the major risks to watch out for:
| Risk | Description | Prevention Tips |
|---|---|---|
| Hypothermia | A dangerous drop in body temperature caused by prolonged exposure to cold. | Stay dry, dress in layers, and avoid sweating. Eat high-energy foods and stay hydrated. |
| Frostbite | Tissue damage from freezing temperatures, usually affecting fingers, toes, nose, or ears. | Wear insulated gloves and boots. Cover exposed skin and keep moving to promote circulation. |
| Avalanches | The sudden downhill movement of snow that can bury anything in its path. | Avoid steep slopes after heavy snowfall. Check avalanche forecasts and carry safety gear like a beacon, probe, and shovel. |
Packing for Emergencies
You should always prepare for the unexpected when heading into winter backcountry areas. Heres a list of emergency essentials every winter camper should carry:
- First aid kit: Include items specific to cold injuries like blister treatment and thermal blankets.
- Navigation tools: Map, compass, and GPS device (don’t rely on your phone alone).
- Shelter: Carry an emergency bivy sack or tarp even if youre using a tent.
- Extra food & water: Pack high-calorie snacks and insulated water bottles or thermoses.
- Lighter & waterproof matches: For building fires quickly in cold conditions.
- Headlamp with extra batteries: Winter nights are long—light is essential for safety.
Navigating in Snowy Terrain
Navigating in snow-covered environments can be tricky since trails may be hidden. Use a combination of tools to stay oriented:
- Map & Compass: Always know how to use them without relying on electronics.
- GPS Device: Useful for tracking your route and marking waypoints.
- Avalanche Awareness Apps: Use apps like Avalanche Forecast or Mountain Hub for real-time info.
Leave No Trace in Winter Conditions
The Leave No Trace principles still apply during winter camping—with a few seasonal tweaks:
- Avoid trampling vegetation under snow: Stick to deep snow areas or established trails when possible.
- Bury human waste properly: In deep snow, dig a cathole well away from campsites and water sources.
- Packed-out trash freezes too: Store your trash securely so animals cant get into it—and always pack it out.
- Campsite selection matters: Camp at least 200 feet from lakes and streams, even when frozen over.
Your Safety Checklist Before You Go
| # | Description |
|---|---|
| 1 | Check local weather and avalanche forecasts. |
| 2 | Create an emergency contact plan—tell someone where youre going and when youll return. |
| 3 | Packing complete emergency gear including backup shelter and fire-starting tools. |
| 4 | Dress appropriately in moisture-wicking base layers, insulating mid-layers, and waterproof outerwear. |
| 5 | Keeps maps downloaded offline or printed as backup navigation tools. |
| 6 | Campsite location selected based on safety from avalanches and cold winds. |
If youre prepared, winter camping can be safe as well as beautiful. Respect nature’s power, plan ahead carefully, and youll enjoy a rewarding adventure even in the coldest months!