1. Understanding the Importance of Water Purification
When youre out in the wild—whether youre hiking deep into a national park, camping in the backcountry, or just spending a night under the stars—clean drinking water is one of your top priorities. It might seem like that mountain stream or quiet lake holds fresh, clean water, but looks can be deceiving. Even the clearest-looking water can carry harmful microorganisms that can make you seriously sick.
Why You Cant Trust Natural Water Sources
Natural water sources, including rivers, lakes, and even melted snow, can contain bacteria, viruses, and parasites like Giardia or Cryptosporidium. These can cause unpleasant and potentially dangerous illnesses such as diarrhea, vomiting, and dehydration—none of which you want to deal with when youre miles from help.
Common Contaminants Found in Wild Water
| Contaminant | Source | Possible Effects |
|---|---|---|
| Bacteria (e.g., E. coli) | Animal waste, human activity | Diarrhea, cramps, nausea |
| Viruses (e.g., Norovirus) | Sewage contamination | Vomiting, fever, fatigue |
| Parasites (e.g., Giardia) | Wildlife feces | Severe gastrointestinal issues |
| Chemicals (e.g., pesticides) | Agricultural runoff | Toxic effects depending on exposure |
The Role of Hydration in Outdoor Survival
Staying hydrated is essential for keeping your energy up and your body functioning properly. When youre active outdoors—especially at higher altitudes or in hot weather—you lose fluids quickly through sweat and breathing. Without enough clean water, you risk dehydration, which can lead to fatigue, confusion, and even heatstroke.
Tip:
A good rule of thumb is to drink about half a liter (16–17 oz) of water per hour during moderate activity in moderate temperatures. If its hotter or youre working harder than usual, youll need more.
Why Beginners Should Prioritize Water Safety
If youre new to camping or hiking off-grid, its easy to overlook water purification because youre focused on gear or navigation. But making sure you have access to safe drinking water should be part of your basic planning—just like packing food or a tent. With a few simple tools and techniques (we’ll cover those next), you can avoid unnecessary health risks and enjoy your outdoor adventures safely.
Understanding why water purification matters is the first step toward being self-reliant in the wild. Once you know what dangers might be lurking in natural water sources and how crucial hydration is to your survival and comfort outdoors, youll never skip this step again.
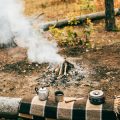
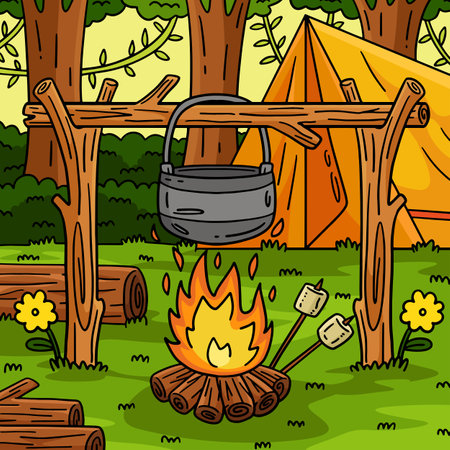
2. Boiling: The Classic and Reliable Method
Boiling water is one of the oldest and most trusted ways to purify water in the wild. Whether youre camping in the backcountry or hiking through a remote trail, all you need is a heat source and a container to get started.
Why Boiling Works
When you bring water to a rolling boil, the high temperature kills off harmful microorganisms like bacteria, viruses, and parasites that can make you sick. According to the CDC, boiling water for at least 1 minute (or 3 minutes at higher altitudes) is enough to make it safe for drinking.
What You’ll Need
| Item | Purpose |
|---|---|
| Metal pot or kettle | To hold and boil your water |
| Campfire or portable stove | Heat source for boiling |
| Lighter or matches | To start your fire or stove |
| Clean container or bottle | To store cooled, boiled water |
Step-by-Step Instructions
- Collect clear water: If possible, choose running water from a stream or river. Let sediment settle if needed.
- Pour into your pot: Fill your metal pot or kettle with the water.
- Start your fire or stove: Use dry wood or fuel to get a steady flame going.
- Place the pot over heat: Bring the water to a full, rolling boil — thats when big bubbles are constantly breaking the surface.
- Boil for at least 1 minute: At elevations above 6,500 feet (about 2,000 meters), boil for at least 3 minutes.
- Let it cool: Allow boiled water to cool before storing it in a clean container for drinking.
Altitude Matters!
The higher you go, the lower the boiling point of water becomes. That means pathogens might survive unless you adjust your boiling time. Here’s a quick reference guide:
| Elevation | Minimum Boiling Time |
|---|---|
| Below 6,500 ft (2,000 m) | 1 minute |
| Above 6,500 ft (2,000 m) | 3 minutes |
Tips for Success
- If your water is cloudy, filter it first using a bandana or coffee filter before boiling.
- A lid on your pot helps the water boil faster and saves fuel.
- Avoid letting ash or dirt fall into your pot when using a campfire.
![]()
3. Portable Water Filters and Purifiers
When youre out in the wild, having a reliable way to filter or purify water is essential. In the U.S., outdoor enthusiasts often rely on portable water filters and purifiers that are designed for hiking, backpacking, and camping. These tools help remove harmful bacteria, protozoa, and even viruses from natural water sources like rivers, lakes, and streams.
Understanding the Difference: Filters vs. Purifiers
Before choosing your gear, its important to know the difference between a filter and a purifier:
| Type | What It Removes | Best For |
|---|---|---|
| Water Filter | Bacteria, protozoa, sediment | Backpacking in North America where viruses are less common |
| Water Purifier | Bacteria, protozoa, viruses | Traveling internationally or in areas with high risk of viral contamination |
Common Types of Portable Water Treatment Devices
There are several types of backpacking filters and purifiers available in the U.S. Each has its own pros and cons depending on your trips length, group size, and water source.
Pump Filters
These use a hand pump to push water through a filter cartridge. Theyre good for filtering dirty or cloudy water but can be bulky.
Squeeze Filters
Lightweight and compact, these work by squeezing water through a hollow fiber membrane using a soft bottle or pouch. Great for solo hikers.
Gravity Filters
Ideal for groups or base camps. You fill a reservoir bag and let gravity pull water through the filter into a clean container—no pumping needed.
Steripen (UV Purifiers)
This uses ultraviolet light to kill bacteria, viruses, and protozoa. Its compact but requires batteries and works best with clear water.
Chemical Treatments (Tablets or Drops)
Iodine or chlorine dioxide treatments are lightweight and effective against most pathogens including viruses. However, they may alter taste and require wait time.
How to Choose Based on Your Trip
The right tool depends on where youre going and what kind of water youll encounter. Heres a quick guide:
| Trip Type | Recommended Treatment Method | Why? |
|---|---|---|
| Weekend hike in U.S. backcountry | Squeeze or pump filter | Lightweight and effective for clear mountain streams |
| Group camping trip near lakes/rivers | Gravity filter system | Saves effort and filters large volumes easily |
| International trekking or remote travel | Purifier (UV or chemical) | Kills viruses common in some developing regions water supplies |
| Emergency backup option | Chemical tablets/drops | No moving parts; long shelf life; ultra-lightweight |
No matter which method you choose, always carry a backup option just in case your primary system fails. Clean drinking water can make all the difference between an enjoyable trip and a dangerous situation.
4. Chemical Treatment Options
If youre heading into the backcountry and need a compact, lightweight way to purify water, chemical treatment methods like iodine tablets or chlorine dioxide drops can be a real game-changer. These options are especially popular with solo hikers and ultralight campers because they’re easy to use, weigh almost nothing, and take up very little space in your pack.
How Do Chemical Treatments Work?
Chemical treatments disinfect water by killing harmful microorganisms like bacteria, viruses, and protozoa. You simply drop a tablet or add a few drops of solution into your container of water, wait the recommended amount of time, and then it’s safe to drink.
Types of Chemical Water Purifiers
| Type | Active Ingredient | Treatment Time | Pros | Cons |
|---|---|---|---|---|
| Iodine Tablets | Iodine | 30 minutes | Lightweight, inexpensive, easy to use | Taste can be unpleasant; not effective against all protozoa like Cryptosporidium |
| Chlorine Dioxide Drops/Tablets | Chlorine Dioxide | 30 minutes to 4 hours (depending on water temp and clarity) | No strong taste, effective against most pathogens including Cryptosporidium | Slightly longer treatment time; more expensive than iodine |
When Should You Use Chemical Treatments?
Chemical methods are best used when youre traveling light, such as during day hikes, solo treks, or thru-hikes. They’re also great as a backup method in case your primary purification system fails. Just remember that heavily contaminated or murky water might need pre-filtering with a cloth or coffee filter before you add the chemicals.
Pro Tip:
If youre using iodine and don’t love the taste, you can add vitamin C tablets after the treatment time has passed. It neutralizes the flavor without affecting the purification process.
5. UV Light and Solar Purification Methods
When youre out in the wild and need clean drinking water, modern technology and some clever science can help. UV light purifiers and solar disinfection are two handy options that dont require fire or chemicals. Theyre especially useful as backup methods or when youre in a hurry.
UV Light Purifiers
UV (ultraviolet) purifiers use high-frequency light to kill bacteria, viruses, and protozoa in water. These devices are small, battery-powered (or USB rechargeable), and easy to use. All you do is stir the UV wand in your bottle of clear water for about 60 seconds. Its fast and effective—perfect for solo hikers or anyone packing light.
Pros and Cons of UV Purifiers
| Pros | Cons |
|---|---|
| Quick treatment time (usually under 2 minutes) | Requires batteries or power source |
| Kills most harmful microbes effectively | Doesnt remove dirt or sediment—water must be clear first |
| Compact and lightweight | Can break if dropped or damaged |
SODIS (Solar Water Disinfection) Method
The SODIS method is a low-tech way to purify water using just sunlight and a clear plastic bottle. Fill a clean PET bottle with clear water, lay it flat in direct sunlight for at least 6 hours (or up to 48 hours if its cloudy), and let the UV rays from the sun do the work.
SODIS Method Quick Guide
| Step | Description |
|---|---|
| 1. Choose a Bottle | Select a clear plastic bottle (preferably PET), no larger than 2 liters. |
| 2. Fill with Clear Water | If the water is murky, filter it first using cloth or sand. |
| 3. Lay Flat in Sunlight | Place the bottle on a reflective surface like aluminum foil or a rock for better exposure. |
| 4. Wait 6–48 Hours | The time depends on sunlight strength; longer in cloudy weather. |
A Few Tips for SODIS Success:
- This method only works if the water is relatively clear.
- Avoid using glass bottles—they block UV rays needed for disinfection.
- If youre camping at high elevations, SODIS can be even more effective due to stronger UV exposure.
If youre looking for a reliable backup plan for your next outdoor adventure, consider tossing a small UV purifier into your gear or learning how to set up the SODIS method with everyday materials. Both methods provide peace of mind without adding much weight to your pack.