1. Choosing the Right Tent for Quick Setup
When youre heading out for a quick weekend camping trip, the last thing you want is to waste precious daylight struggling with complicated tent poles and confusing instructions. Choosing a tent thats designed for fast setup can save you time, energy, and stress—so you can spend more of your weekend enjoying nature.
Fast-Setup Tent Styles
There are several types of tents built with convenience in mind. Here are two of the most popular styles among weekend campers:
| Tent Type | Setup Time | Best For | Pros | Cons |
|---|---|---|---|---|
| Pop-Up Tent | Under 1 minute | Solo campers or couples | Extremely fast setup, lightweight, compact | Less durable, limited space |
| Instant Cabin Tent | 2–5 minutes | Families or groups | Spacious, pre-attached poles, tall ceilings | Bulkier to transport, heavier |
What to Look for When Buying a Time-Saving Tent
If quick setup is your top priority, keep an eye out for these key features when shopping:
- Pre-Attached Poles: Tents with integrated pole systems require less assembly and reduce confusion.
- No Tools Required: Choose designs that don’t require extra tools—you shouldn’t need a screwdriver in the woods.
- Color-Coded Parts: Helps speed up setup and ensures pieces are connected correctly.
- Packed Size & Weight: Consider how easy it is to carry if youll be hiking to your campsite.
- User Reviews: Read reviews from other campers to confirm real-world ease of use.
Pro Tip:
If youre new to camping or plan to set up in low light, practice pitching your tent at home first. That way, you’ll know exactly what to do when you arrive at the campsite—and won’t waste valuable daylight figuring things out.
A good tent doesn’t have to take forever to set up. With the right style and smart features, you can go from trunk to tent in just minutes—leaving more time for s’mores and stargazing.
2. Pre-Trip Prep: Practice Makes Perfect
If youre planning a weekend camping trip, every minute counts—especially when youre racing the sunset to get your tent set up. One of the best time-saving hacks? Set up your tent at home before you hit the road. It might sound like extra work, but this quick pre-trip prep can save you tons of time and frustration once you’re out in the wild.
Why Practice at Home?
Doing a trial run in your backyard or even your living room can help you:
- Get familiar with how your tent works
- Check for missing or damaged parts
- Learn the quickest assembly method
- Avoid on-site surprises and delays
What You Should Do During Your Practice Setup
Use this checklist during your test run to make sure youre fully prepared:
| Task | Why It Matters |
|---|---|
| Unpack and lay out all components | Makes sure nothing is missing or broken |
| Follow step-by-step setup instructions | Helps you learn the most efficient setup process |
| Time yourself | Keeps track of how long it takes so you can improve speed |
| Pretend its windy or raining | Prepares you for less-than-perfect campground conditions |
| Re-pack everything neatly | Makes reassembly easier and faster at the campsite |
Pro Tip: Make It a Family Activity
If youre camping with kids or friends, get everyone involved in the practice run. Assign roles like pole handler, stake manager, or rainfly specialist. Not only does this make things go faster, but it also turns setup into a fun team effort instead of a stressful chore.
Bonus Benefit: Peace of Mind
No one wants to discover they forgot tent stakes after driving two hours into the woods. A home setup lets you double-check that youve packed everything—and gives you confidence knowing youre ready for anything the campground throws your way.
![]()
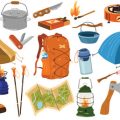
3. Organize Gear for Efficient Assembly
One of the easiest ways to save time during tent setup is by organizing your gear before you even leave home. Weekend camping trips are all about making the most of your limited time outdoors, and digging through a messy pile of gear isnt how you want to spend your Friday evening. By packing smart and labeling everything clearly, youll know exactly where each item is and be able to set up camp in minutes.
Label Everything
Use colored tape, tags, or waterproof labels to mark your gear. Color-coding can help you quickly identify which items belong together—like poles with tents or stakes with guylines. This is especially helpful when camping with friends or family who bring their own equipment.
Color-Coding Example:
| Color | Gear Category |
|---|---|
| Red | Tent & Poles |
| Blue | Sleeping Gear |
| Green | Cooking Equipment |
| Yellow | Lighting & Power |
Use Clear Storage Bins or Packing Cubes
Instead of tossing everything into one large duffel bag, divide your gear into clear bins or labeled packing cubes. This way, when you arrive at your campsite, you can pull out only what you need without unpacking everything.
Packing Tip:
Keep a dedicated “Tent Setup” bin that includes your tent, stakes, mallet, footprint, guylines, and repair kit. Store it near the top of your car trunk so it’s the first thing you grab when setting up.
Create a Checklist
A simple checklist helps ensure you don’t forget anything important and makes repacking easier after each trip. Keep this list laminated or saved on your phone for quick reference.
Sample Tent Setup Checklist:
- Tent body
- Tent poles (labeled)
- Stakes (in labeled pouch)
- Mallet or hammer
- Ground tarp or footprint
- Guylines & tensioners
- Duct tape or patch kit (for quick fixes)
By keeping your gear organized and easy to access, youll spend less time searching and more time enjoying the outdoors.
4. Use Ground Markers and Setup Tools
One of the easiest ways to shave time off your tent setup is by using smart tools and visual aids. Whether you’re a seasoned camper or just heading out for a quick weekend getaway, these tricks can make pitching your tent faster and less stressful.
Ground Markers: Know Where Everything Goes
Before you even unroll your tent, mark out where everything should go using small ground markers or flags. This helps avoid confusion about orientation and spacing, especially if youre setting up in low light or on uneven terrain. You can use simple garden stakes or colored flags to mark:
- Corners of the tent footprint
- Entrance direction
- Guyline positions
Custom Stakes Make a Difference
Standard stakes often bend or don’t hold well in certain soil types. Upgrading to custom or heavy-duty stakes not only saves time but also gives you peace of mind once your tent is up. Look for these features when choosing better stakes:
| Stake Type | Best For | Why It Saves Time |
|---|---|---|
| Y-Stakes (Aluminum) | Sandy or loose soil | Hold firm without slipping, fewer re-adjustments needed |
| Nail Stakes (Steel) | Hard or rocky ground | Can be hammered in easily, more durable under pressure |
| Screw-In Stakes | All terrains | Fast to install with drill or hand tool, super secure |
Color-Coded Poles: Your Best Friend in the Dark
If your tent comes with color-coded poles and sleeves, use them! If not, consider adding colored tape or zip ties yourself. Matching colors makes it easy to know which pole goes where—especially helpful when setting up at night or when youre tired from the drive.
DIY Tip:
Add colored duct tape to each pole segment and its matching sleeve on the tent. For example:
| Pole Color | Tent Area |
|---|---|
| Red Tape | Main support arch/front door area |
| Blue Tape | Rear support arch/back panel area |
| Green Tape | Rainfly attachment points |
Quick Recap:
- Use ground markers to plan your layout before unpacking.
- Choose custom stakes based on terrain for faster, stronger setup.
- Add color coding to poles for easier assembly in any condition.
A little prep goes a long way—these tools take minutes to set up but save loads of time every trip.
5. Teamwork Tips for Faster Setup
Setting up camp can be a breeze when everyone knows their role and works together. Whether youre camping with family or friends, a little planning and teamwork can save you tons of time and energy. Heres how to make the most of your crew for a faster tent setup.
Delegate Roles Before Arrival
Before you even hit the campground, assign roles based on everyones strengths. This avoids confusion and keeps everyone focused when its time to set up. Heres an example of how you might split tasks:
| Role | Responsibility |
|---|---|
| Team Lead | Oversees setup, ensures everyones on task |
| Ground Crew | Clears debris, lays down footprint or tarp |
| Pole Master | Assembles and installs tent poles |
| Tent Architect | Handles tent body and rainfly setup |
| Anchor Specialist | Secures stakes and guy lines |
Use Simple Communication Hacks
Keep things moving with clear, simple communication. Try these quick tips:
- Hand signals: Useful in windy areas or if music is playing.
- Call-and-response phrases: Like “Ready?” – “Ready!” to confirm tasks are done.
- Walkie-talkies: Great for large sites or if kids are helping from a distance.
Create a Setup Routine
If you camp often with the same group, develop a go-to routine so everyone knows what to do without asking. Practice it at home first! Here’s an example routine that works for many families or friend groups:
- Scout and clear the site (Ground Crew)
- Laying the ground tarp (Ground Crew + Tent Architect)
- Tent pole assembly (Pole Master)
- Erecting the tent body (Tent Architect + Pole Master)
- Staking corners and attaching rainfly (Anchor Specialist + Team Lead)
- Final inspection and gear placement (Everyone)
Pro Tip:
If you’re camping with kids, involve them too! Give them light but helpful roles like holding stakes or handing over gear—this keeps them engaged and teaches responsibility.
The key to saving time during setup is working smarter as a team. With good planning, clear communication, and well-defined roles, youll be roasting marshmallows in no time!