Understanding Local Weather Challenges
If you’re planning your first camping trip in the United States, getting familiar with local weather patterns is crucial. The U.S. covers a huge range of climates and landscapes—meaning the weather can change quickly and dramatically depending on where you are. Being prepared for these changes is the first step to making sure your gear keeps you safe, dry, and comfortable.
Common Weather Conditions Across the U.S.
From humid southern summers to chilly northern forests, knowing what to expect can make all the difference. Here’s a quick look at some typical weather situations campers face:
| Region | Typical Weather | Camping Impact |
|---|---|---|
| Northeast | Rainy springs, hot & humid summers, cold falls | Mud, condensation inside tents, sudden temperature drops |
| Southeast | Thunderstorms, high humidity, hurricane season (summer/fall) | Flash floods, wet gear, strong winds |
| Midwest | Unpredictable storms, tornado season (spring/summer), cold winters | Wind damage, rapid weather changes, lightning risk |
| Southwest | Hot days, cool nights, monsoon storms (late summer) | Dehydration risk, flash flooding in canyons |
| Rocky Mountains & West | Unpredictable mountain weather: sun, rain, hail—all in one day! | Soggy gear, hypothermia risk due to rapid cooling after rain or hail |
| Pacific Northwest | Mild temps but frequent rain/mist almost year-round | Damp clothing and tents, mold and mildew on gear |
Why It Matters for Your Gear
If you’re not ready for what nature throws at you, it’s easy for things like leaky tents or soaked sleeping bags to ruin your trip. For example, summer thunderstorms can pop up with little warning in many states—especially in the Midwest and Southeast. In the mountains out West, sunny mornings can turn into chilly rainstorms by afternoon. These shifts mean you need weatherproofing as a core part of your camping prep.
Key Takeaway:
No matter where you camp in the U.S., understanding local weather is step one to protecting yourself—and your gear—from getting drenched or damaged. A little research goes a long way toward a fun and safe adventure.
2. Clothing Choices That Work
Layering: The Secret to Staying Comfortable
When you’re camping in unpredictable weather, layering is your best friend. American campers swear by the three-layer system: a moisture-wicking base layer, an insulating middle layer, and a waterproof outer layer. This setup lets you add or remove clothing as temperatures change throughout the day.
| Layer | Purpose | Popular Brands |
|---|---|---|
| Base Layer | Wicks away sweat and moisture | Under Armour, Patagonia Capilene, Smartwool |
| Middle Layer | Adds warmth (insulation) | The North Face, Columbia, REI Co-op |
| Outer Layer | Blocks wind and rain | Arc’teryx, Marmot, Patagonia Torrentshell |
Why Waterproof Jackets Matter
A good waterproof jacket can make or break your trip. Look for jackets labeled “GORE-TEX” or “waterproof/breathable.” These keep rain out while letting sweat escape, so you stay dry inside and out. Many experienced campers trust brands like Patagonia, Columbia, and Marmot for reliable rain gear that stands up to the elements.
The Role of Moisture-Wicking Fabrics
Cotton might feel comfy at home, but it’s not your friend on the trail. When it gets wet, cotton stays wet—which can leave you cold and miserable. Instead, go for synthetic fabrics like polyester or nylon, or natural options like merino wool. These materials pull moisture away from your skin and dry quickly, helping you stay comfortable even when you’re working up a sweat.
Quick Tips for Choosing Camping Clothes
- Avoid cotton: “Cotton kills” is a popular saying in American camping circles.
- Check seams and zippers: Make sure jackets have taped seams and sturdy zippers for better waterproofing.
- Packing extras: Always bring an extra pair of socks—wet feet are no fun!
- Bright colors: They’re easier to spot if you get separated from your group.
This approach to dressing will help you stay warm, dry, and ready for whatever Mother Nature throws your way on your next camping adventure.

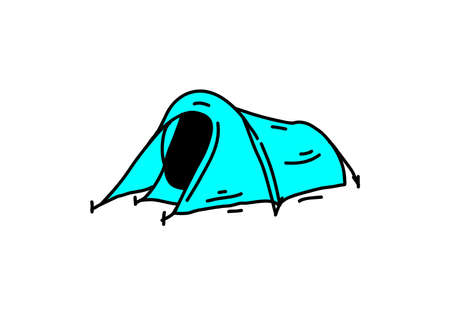
3. Waterproofing Your Shelter
When you’re out camping, staying dry is a top priority. Even the most beautiful campsite can turn into a soggy mess if your shelter isn’t ready for wet weather. Here’s how to make sure your tent stands up to any downpour.
Selecting Tents with Solid Rainflies
Not all tents are created equal when it comes to rain protection. Look for tents that come with a full-coverage rainfly—this is the outer layer that covers your tent and acts as the first line of defense against rain. Avoid tents with just a partial rainfly, as they often leave windows or corners exposed to water leaks.
| Tent Feature | Why It Matters |
|---|---|
| Full-Coverage Rainfly | Shields the entire tent from rain, including doors and windows |
| Waterproof Rating (mm) | Higher numbers mean better resistance to heavy rain (look for 1500mm+) |
| Sealed Seams | Prevents water from sneaking in through stitching holes |
| Vestibules/Awning | Adds extra covered space for gear and helps keep tent entrances dry |
Using Tarps for Extra Protection
A tarp can be a game-changer in bad weather. You can set one up above your tent as an extra shield or place one under your tent floor to prevent ground moisture from seeping in. Just make sure the tarp doesn’t stick out past your tent edges; otherwise, it could funnel water underneath.
Tarp Setup Tips:
- Hang a tarp overhead using trees or poles for extra coverage during storms
- Use a ground tarp (footprint) that matches your tent size
- Aim for a slight angle so water runs off easily instead of pooling on top
Sealing Tent Seams and Zippers
Even high-quality tents need a little extra help sometimes. Apply seam sealer along all stitched areas inside your tent, especially around corners and the floor. Don’t forget to check zippers—some models let you add waterproof tape or spray for added protection.
Quick Steps for Seam Sealing:
- Pitch your tent in a dry area at home before your trip
- Clean seams with a damp cloth and let dry completely
- Apply seam sealer following the product instructions
- Let it cure fully before packing up your tent again
A bit of prep work goes a long way. With these simple steps, you’ll stay dry and comfortable—even when Mother Nature throws her worst at you!
4. Keeping Your Gear Dry
If you’re new to camping in the US, one of the top things you’ll hear from experienced campers is “keep your gear dry!” Sudden rain, morning dew, or a leaky water bottle can ruin clothes, electronics, and food. Luckily, there are easy ways to weather-proof your gear so you don’t end up with soggy socks or a dead phone.
Must-Have Waterproofing Tools
| Item | Main Use | US Camper Tips |
|---|---|---|
| Dry Bags | Protect electronics, clothes | Seal tightly; color code by item for easy access |
| Pack Liners (Garbage Bags) | Line your backpack to keep everything inside dry | Heavy-duty trash bags work great and are cheap! |
| Ziploc Bags | Store food, first aid kits, small electronics | Double-bag valuables for extra protection |
How to Use These Tools Like a Pro
- Dry Bags: Place your phone, camera, and spare clothes in dry bags before packing them. Roll the top down at least three times and clip it shut to lock out water.
- Pack Liners: Before packing anything else, line your backpack with a heavy-duty garbage bag or a dedicated pack liner. Stuff all your gear inside—this creates a waterproof barrier even if rain soaks through your pack’s outer shell.
- Ziploc Bags: Perfect for snacks, matches, maps, or charging cables. US campers often use gallon-sized Ziplocs for organizing items and keeping moisture away. They’re also handy for keeping odors from food sealed up tight.
Extra Tip: Layer Your Protection
Mix and match these tools. For example, put your clean socks in a Ziploc bag inside a dry bag, then store everything in a lined pack. That way, even if something leaks or rain sneaks in, your essentials stay dry.
5. Best Practices for Setting Up Camp
Pick the Right Campsite
The first step in weather-proofing your gear starts with where you set up camp. Always look for a spot that is flat, but not at the very bottom of a valley or hill. Low-lying areas can collect water during rainstorms and may flood quickly. Instead, find a site that is slightly elevated to help water drain away from your tent.
Pitch Your Tent on Higher Ground
Setting your tent on higher ground is one of the easiest ways to stay dry. Avoid setting up too close to rivers, lakes, or streams—these can rise quickly if it rains. Also, steer clear of ditches and depressions where water can pool. Here’s a simple comparison:
| Location | Risk Level | Weather-Proof Benefit |
|---|---|---|
| High Ground | Low | Keeps you dry; water drains away from tent |
| Near Water (streams/lakes) | High | Flood risk; tent may get wet or washed out |
| Low Spots/Valleys | High | Water pools here; high chance of flooding |
Avoid Flood-Prone Areas
If you’re camping in an area known for sudden storms or heavy rainfall, take extra care to check the lay of the land. Dry creek beds might seem safe when it’s sunny, but they can turn into rushing streams overnight. Always ask park rangers or check local maps for information about flood-prone zones before picking your spot.
Quick Tips for Weather-Proof Setup:
- Clear away rocks and sticks before pitching your tent—they can damage the floor and let water seep in.
- Use a footprint or ground tarp under your tent to add an extra layer of protection against moisture.
- Stake down your tent securely and use guylines to keep it stable in strong winds.
- If possible, position your tent so that the door faces away from prevailing winds to prevent rain from blowing inside.
- Keep gear stored inside the tent or under a rainfly to stay dry overnight.
By following these best practices, beginners can make sure their camping trip stays comfortable and their gear remains protected from whatever weather comes their way.