1. Understanding the Importance of Water Purification
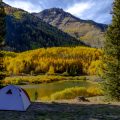
When youre camping at a remote dispersed site far from developed campgrounds, one of the most critical things to consider is your water source. Sure, that clear mountain stream or peaceful lake might look clean, but looks can be deceiving. Even the clearest water in the backcountry can carry harmful microorganisms and contaminants that can make you seriously sick.
Why You Should Always Purify Water
Backcountry water sources often contain invisible threats like bacteria, viruses, and parasites. These pathogens can come from animal waste, decaying plants, or even upstream campers who didn’t follow Leave No Trace principles. Drinking untreated water can lead to illnesses such as:
| Contaminant | Possible Illness | Common Symptoms |
|---|---|---|
| Giardia | Giardiasis | Diarrhea, stomach cramps, nausea |
| E. coli | Bacterial infection | Vomiting, fever, dehydration |
| Norovirus | Viral gastroenteritis | Stomach pain, vomiting, diarrhea |
| Cryptosporidium | Cryptosporidiosis | Watery diarrhea, weight loss, fatigue |
The Risk Isn’t Worth It
You might think its okay to skip purification just once—especially if youre thirsty and the water looks pristine. But even a single sip of contaminated water can ruin your trip with days of discomfort or worse. In some cases, it can lead to long-term health problems or require emergency evacuation.
Peace of Mind on Your Adventure
Purifying your water not only keeps you safe but also gives you peace of mind so you can focus on enjoying nature. Whether youre hiking deep into national forests or setting up camp beside an alpine lake, treating your water is a simple step that makes a big difference.
2. Assessing Your Water Source
When youre camping in remote, dispersed areas without access to treated water, finding a natural water source is your first step toward staying hydrated safely. But not all water in the wild is safe to drink. Streams, springs, and lakes can look clean but still carry harmful contaminants like bacteria, viruses, or chemical pollutants. Heres how to assess your water source before purifying it.
Common Natural Water Sources
| Water Source | Pros | Cons |
|---|---|---|
| Streams | Often flowing and oxygenated, which helps reduce bacteria buildup | May be contaminated by wildlife, upstream campers, or agricultural runoff |
| Springs | Usually cleanest; originates underground and filtered through rock layers | Harder to locate; may still contain minerals or pathogens if exposed to surface elements |
| Lakes & Ponds | Easy to access; typically holds plenty of water for larger groups | Stagnant water increases risk of algae blooms, parasites, and bacteria |
Signs of a Reliable Water Source
- Clear, flowing water: Fast-moving streams are generally safer than stagnant pools.
- No visible pollution: Avoid sources near roads, farms, or human activity that could introduce chemicals or waste.
- Away from animal activity: Look for signs like tracks or droppings. If animals use the area frequently, its more likely the water is contaminated.
- Upstream collection: Always collect water upstream from any campsites or trails to avoid picking up contaminants.
- No unusual color or smell: Water with a strange color or odor should be avoided—it might contain algae or chemical runoff.
Things to Watch Out For
If youre unsure about the safety of a water source, consider these red flags before collecting:
Muddy or Cloudy Water
This could indicate sediment or organic material. While filtration can help, it’s best to find clearer water if possible.
Dead Animals Nearby
If you see dead fish or animals close to the water source, it might be contaminated with bacteria or chemicals. Choose another spot.
Algae Blooms (Especially Blue-Green Algae)
Lakes and ponds with green scum on the surface may be experiencing an algal bloom. Some types can produce toxins that are dangerous even after purification methods like boiling or filtering.
Quick Tips for Better Water Collection
- Use a bandana or coffee filter over your bottle opening when scooping up water to reduce debris.
- If using a pump filter, pre-filtering helps extend the life of your equipment.
- Avoid digging into muddy riverbanks—stick to mid-stream flow when possible.
The key takeaway is: never assume water is safe just because it looks clean. Take time to evaluate your source before choosing your purification method. In the next section, well break down the different ways you can treat this collected water to make it safe for drinking at your remote campsite.
3. Boiling Water the Right Way
Boiling water is one of the simplest and most reliable ways to purify drinking water when youre camping off-grid in remote dispersed campsites. It kills bacteria, viruses, and parasites that can make you sick. But there’s more to it than just throwing a pot on the fire. Here’s how to do it right.
Why Boiling Works
Boiling destroys harmful microorganisms by heating water to a temperature where pathogens cant survive. At sea level, water boils at 212°F (100°C), which is hot enough to kill most disease-causing organisms within one minute.
Altitude Adjustments
The higher you go, the lower the boiling point of water becomes. That means you’ll need to boil water longer to ensure its safe to drink. Heres a quick guide:
| Elevation | Boiling Point | Recommended Boil Time |
|---|---|---|
| Sea Level (0–2,000 ft) | 212°F / 100°C | 1 minute |
| 2,000–6,500 ft | 203–208°F / 95–98°C | 3 minutes |
| Above 6,500 ft | < 203°F / <95°C | 5 minutes |
Fuel-Efficient Boiling Tips
If you’re using a backpacking stove or campfire with limited fuel, here are some smart ways to boil efficiently:
- Use a lid: Covering your pot helps trap heat and speeds up the boiling process.
- Shelter your flame: Wind can suck heat away from your pot. Use a windscreen or cook behind natural barriers like rocks or logs.
- Avoid over-boiling: Once your water has reached a rolling boil for the recommended time, remove it from heat to save fuel.
- Boil in batches: If you need a lot of water, boil larger amounts at once rather than multiple small batches.
Quick Steps for Safe Boiled Water
- Fill your pot with clear water—avoid muddy or cloudy sources if possible.
- Place it on a stable heat source like a camp stove or controlled fire.
- Bring the water to a rolling boil (big, continuous bubbles).
- Keep it boiling for the appropriate time based on your elevation.
- Let it cool naturally before drinking or storing in clean containers.
Important Note:
If your only water source is cloudy or murky, let it sit so sediments settle at the bottom, then pour off the top layer through a cloth or coffee filter before boiling. This helps improve both taste and purification effectiveness.
4. Portable Filtration Solutions
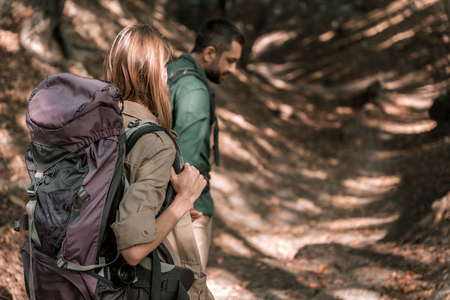
When youre camping at a remote dispersed site, access to clean water is a top priority. Portable water filters and pump systems are essential tools that can help you turn questionable water sources into safe drinking water. In the U.S., there are several types of portable filtration systems, each with its own strengths and limitations. Below, we break down the most common options available on the market today.
Types of Portable Water Filters
Pump Filters
Pump filters use manual power to draw water through a filter cartridge. Theyre great for filtering water from shallow streams or lakes and allow you to control how much water you need.
- Pros: Fast flow rate, good for groups, effective against bacteria and protozoa
- Cons: Bulky, requires effort to pump, some models need regular maintenance
- Best Use: Group camping or when filtering large amounts of water
Squeeze Filters
Squeeze filters are lightweight and compact. You fill a soft bottle or pouch with dirty water, attach the filter, and squeeze clean water out.
- Pros: Lightweight, affordable, easy to use
- Cons: Slower flow rate, not ideal for large volumes of water
- Best Use: Solo backpackers or ultralight campers
Straw Filters
Straightforward and super compact, straw filters let you drink directly from the source through a filter. No setup required.
- Pros: Extremely lightweight, simple to use, no moving parts
- Cons: Not practical for storing filtered water, only works at the source
- Best Use: Emergency backup or day hikes near reliable water sources
Bottle Filters
Bottle filters combine a container and built-in filter. Just fill it up and drink—perfect for on-the-go hydration.
- Pros: Convenient all-in-one design, no extra gear needed
- Cons: Limited capacity, replacement filters can be pricey
- Best Use: Day trips or casual camping where portability matters
Gravity Filters
This system uses gravity to pull unfiltered water through a hose and into a clean reservoir. It’s efficient for filtering large amounts of water with minimal effort.
- Pros: Great for groups, low physical effort, high capacity
- Cons: Slower process, setup takes space, needs hanging location
- Best Use: Base camps or family/group camping trips
Comparison Table: Portable Water Filter Types
| Filter Type | Weight | Flow Rate | Ideal For | Main Drawback |
|---|---|---|---|---|
| Pump Filter | Medium-Heavy | Fast (1L/min+) | Groups/Base Camps | Manual labor & bulkier size |
| Squeeze Filter | Very Light | Moderate (0.5–1L/min) | Solo/Ultralight Backpackers | Not ideal for group use |
| Straw Filter | Ultra-Lightweight | Direct Use Only | Emergency/Day Hikes | No storage ability for filtered water |
| Bottle Filter | Light-Medium | Moderate (Drink-as-you-go) | Casual Camping/Traveling Lightly | Limited volume per bottle fill-up |
| Gravity Filter | Medium-Heavy (but hands-free) | High (multi-liter per session) | Families/Larger Groups/Base Campers | Requires setup space & time |
Caring for Your Filter System: Maintenance Tips
- Backflushing: Many filters require regular backflushing to maintain flow rate—especially squeeze and gravity models.
- Avoid Freezing: Once used, most filters can be damaged if frozen with residual moisture inside.
- Dried Storage: Let your filter dry completely before storing long-term to prevent mold buildup.
A Quick Note on Safety Standards in the U.S.
The EPA regulates public drinking water but not outdoor sources like streams or lakes. Always assume backcountry water contains contaminants such as Giardia or Cryptosporidium unless properly treated. Most portable filters sold in the U.S. meet NSF/ANSI standards for bacterial and protozoan removal—but always read product specs carefully before purchasing.
Selecting the right portable filtration method depends on your trip length, group size, weight considerations, and personal preferences. Knowing your options ensures youll have safe drinking water no matter how far off-grid you go.
5. Chemical Treatments and UV Purifiers
When youre camping in remote dispersed areas, carrying lightweight and reliable water purification methods is essential. Two popular options are chemical treatments (like tablets and drops) and ultraviolet (UV) light purifiers. These methods are compact, easy to use, and can handle a variety of harmful microbes.
Chemical Treatments
Chemical water treatments use substances like iodine or chlorine dioxide to kill bacteria, viruses, and protozoa. Theyre widely available in tablet or liquid drop form and are great for backpackers due to their small size and long shelf life.
How to Use
- Tablets: Drop one tablet into a liter (or quart) of clear water. Wait the recommended time—usually 30 minutes to 4 hours depending on the product and water clarity.
- Drops: Mix part A and B if required (some systems use two-part mixes), then add to your water container. Shake well and let sit as directed.
Pros and Cons
| Pros | Cons |
|---|---|
| Lightweight and compact | Treatment time can be long |
| Kills most bacteria, viruses, and protozoa | Might leave an aftertaste (especially iodine) |
| No batteries or moving parts | Less effective in very cold or murky water |
UV Light Purifiers
UV purifiers work by using ultraviolet light to neutralize bacteria, viruses, and protozoa. These devices often look like pens or small wands that you stir in your water bottle for about 60 seconds.
How to Use
- Make sure the water is clear; pre-filter if necessary.
- Turn on the UV device and insert it into your bottle.
- Stir as directed—usually around one minute per liter.
- The light will automatically shut off when done.
Pros and Cons
| Pros | Cons |
|---|---|
| No taste added to water | Requires batteries or USB charging |
| Kills a wide range of microbes quickly | Ineffective in cloudy or murky water unless pre-filtered |
| User-friendly with quick treatment time | More expensive than tablets/drops |
Taste Considerations
If youre sensitive to taste, UV purifiers may be more appealing since they don’t alter the flavor of your water. Chemical treatments, especially iodine-based ones, can leave a distinct taste. Some brands offer neutralizing tablets to improve taste after treatment.
Effectiveness Against Microbes
| Treatment Method | Bacteria | Viruses | Protozoa (e.g., Giardia) |
|---|---|---|---|
| Chemical Tablets/Drops (Chlorine Dioxide) | ✔️ | ✔️ | ✔️ (with longer wait times) |
| Chemical Tablets/Drops (Iodine) | ✔️ | ✔️ | ❌ (less effective against Cryptosporidium) |
| UV Purifier Pens/Wands | ✔️ | ✔️ | ✔️ (if water is clear) |
Selecting the right method depends on your trip length, weight limits, budget, and personal preferences. Either way, always have a backup plan in case your primary method fails or runs out of battery or supplies.
6. Best Practices for Storing and Transporting Clean Water
Once youve gone through the effort of purifying your water at a remote dispersed campsite, the last thing you want is to accidentally contaminate it again. Keeping your clean water safe requires the right gear, good habits, and a little planning. Here are some best practices to help you store and transport purified water safely when youre off-grid.
Choose the Right Containers
Not all containers are created equal when it comes to storing drinking water in outdoor settings. Look for containers that are:
- BPA-Free: Avoid chemicals that could leach into your water.
- Opaque: Blocks sunlight to prevent algae growth.
- Durable and Sealed: Prevents leaks and keeps out dirt or bugs.
- Easy to Clean: Smooth surfaces with wide openings are ideal.
Common Container Options
| Container Type | Pros | Cons |
|---|---|---|
| Hard Plastic Jugs (5-7 gallons) | Durable, reusable, large capacity | Bulky, heavier to carry |
| Collapsible Water Containers | Lightweight, space-saving | Less durable, may develop leaks over time |
| Hydration Bladders | Great for hiking, easy to drink from | Difficult to clean thoroughly |
| Nalgene or Stainless Steel Bottles | Tough, ideal for personal use | Small capacity, not ideal for group storage |
Keep It Clean: Storage Hygiene Tips
- Sanitize Before Use: Rinse new or stored containers with a mild bleach solution (1 tsp unscented bleach per quart of water) before filling with purified water.
- No Double Dipping: Never dip dirty cups or hands directly into your clean water source. Pour instead.
- Avoid Cross-Contamination: Keep separate containers for untreated and treated water. Label them clearly if needed.
- Tighten Lids Securely: Make sure lids are properly closed to avoid spills or exposure to contaminants like dirt or insects.
- Store in the Shade: Keep containers out of direct sunlight to reduce heat buildup and bacterial growth inside.
Transport Tips for Remote Campsites
If youre hiking into a dispersed site or moving camp frequently, plan how youll carry your clean water efficiently:
- Use Multiple Small Containers: Easier to distribute weight among backpacks and prevent total loss if one leaks.
- Padded Carriers: Use insulated sleeves or padded cases to protect bottles from punctures or temperature changes.
- Squeeze Bottles for Quick Access: Great for day hikes without opening your main supply.
A Little Extra Goes a Long Way
Always carry more clean water than you think youll need—especially in remote areas where finding another source might be difficult. Staying hydrated is important, but so is making sure the water youre drinking stays safe from the moment you purify it until the last drop is gone.