1. Stay Calm and Assess Your Situation
If you ever find yourself lost in the woods, the very first thing to do is stay calm. It’s totally normal to feel anxious or scared, but keeping a clear head is your best tool for getting out safely. Panicking can make you lose track of where you are, forget important details, or even make unsafe choices.
Why Staying Calm Matters
When you’re calm, your brain works better. You think more clearly, make smarter decisions, and avoid wasting energy. In stressful situations, it’s easy to react without thinking—maybe by wandering further off-trail or ignoring signs that could help you get back on track.
Quick Steps to Regain Your Calm
| Action | How It Helps |
|---|---|
| Breathe deeply (inhale for 4 seconds, exhale for 6) | Slows your heart rate and clears your mind |
| Sit down for a minute | Stops you from moving around aimlessly |
| Remind yourself: “I have options” | Builds confidence and reduces panic |
Assessing Your Surroundings Before Making Any Moves
Once you’re calm, take a good look around. Don’t rush off in any direction just yet. Here’s how to evaluate where you are:
- Look for Landmarks: Are there unique trees, rocks, streams, or hills nearby? Try to remember what you passed earlier.
- Listen: Can you hear sounds like water flowing, vehicles, or voices? These clues might point toward roads or campsites.
- Check the Time and Weather: Knowing how much daylight is left and whether weather might change helps you plan your next steps.
- Inventory Your Supplies: What do you have in your backpack? Water, snacks, a map, whistle? This affects your options.
Simple Self-Assessment Checklist
| Question | Your Answer/Notes |
|---|---|
| What was the last landmark I remember? | |
| How much daylight is left? | |
| What gear or supplies do I have? | |
| Is my phone charged? Do I have service? | |
| Do I hear any man-made sounds? |
The bottom line: Don’t let fear take over. A calm approach gives you the best shot at making good choices—and getting back safely.
2. Signal for Help
Practical Ways to Attract Attention
If you’re lost in the woods, getting noticed is crucial. Here are some practical ways to signal for help using items you probably have with you:
| Item | How to Use It | Why It Works |
|---|---|---|
| Cell Phone | Call 911 if you have a signal. If not, text someone your location or try calling at higher ground. | Direct communication can bring help faster. Texts sometimes go through when calls don’t. |
| Whistle | Blow three loud blasts (universal distress signal), pause, and repeat every few minutes. | The sound carries farther than shouting and uses less energy. |
| Mirror or Shiny Object | Reflect sunlight by angling the mirror toward where rescuers might be, like open skies or search helicopters. | The flash of light can be seen from far away during the day. |
| Bright Clothing or Gear | Hang or wave bright items on a branch or tree in an open area. | Makes you more visible from a distance, especially from above. |
| Fire/Smoke | If safe, build a smoky fire in a clearing during the day. At night, a fire’s glow can attract attention. | Smoke and fire are visible signals that indicate someone may need help. |
Knowing When and How to Use Your Cell Phone or Whistle
Using Your Cell Phone Wisely
- If your phone has some battery and a weak signal, send a quick text with your last known location—it uses less battery than a call.
- If there’s no service, turn your phone off or use airplane mode to save battery. Check for signal occasionally from higher ground or clearings.
- Avoid using battery-draining apps (like games or social media) while waiting for rescue.
Whistle Signals: The Universal Language for Help
- The standard distress call is three short blasts—pause—and repeat. This pattern is recognized as a call for help in North America.
- If you hear a whistle response (two blasts), it usually means someone heard you and is coming.
- A whistle works better than shouting since it’s louder and doesn’t tire you out as quickly.
Quick Tips for Getting Noticed:
- Find an open area where rescuers can spot you from afar—avoid thick tree cover if possible.
- Create large, unusual shapes on the ground using rocks, logs, or clothing—symbols like “SOS” are easy to recognize from above.
- If it’s nighttime, keep your flashlight or phone screen pointed upward and turn it on and off in bursts to get attention without draining the battery too fast.
Staying calm and focused makes your signals more effective—rescuers are trained to look for patterns, movement, and bright colors. Keep signaling regularly until help arrives.

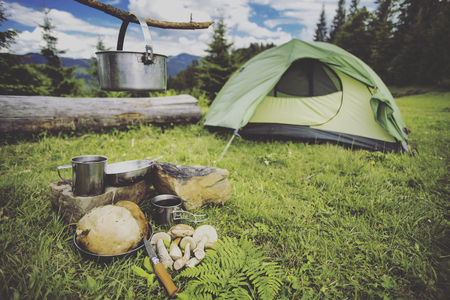
3. Finding or Creating Shelter
Why Shelter Matters
When you’re lost in the woods, shelter is one of your top priorities. Exposure to the elements—rain, cold, wind, or even intense sun—can quickly become life-threatening. A good shelter protects you from hypothermia, heat exhaustion, and keeps you comfortable while you wait for help.
Essential Tips for Protecting Yourself
- Stay Dry: Wet clothes can chill your body fast. Find a spot with natural cover or build something to shield yourself from rain and moisture.
- Block the Wind: Wind can strip away your body heat. Use rocks, logs, or thick bushes as barriers.
- Avoid Low Spots: Cold air settles in valleys and dips. Try to set up your shelter on slightly higher ground to stay warmer and avoid collecting water if it rains.
- Use What You Have: Your backpack, poncho, or even large trash bags can be used as emergency shelter materials.
Choosing a Safe Shelter Location
| Do | Don’t |
|---|---|
| Pick a flat area away from hazards (like falling branches) | Settle under dead trees or near loose rocks |
| Stay close to open areas where rescuers can spot you | Hide deep in thick brush that makes you hard to see |
| Look for natural overhangs or dense evergreens for quick cover | Shelter too close to rivers or streams that may flood |
Simple Shelter Ideas
- Lean-to: Prop sturdy branches against a fallen log or rock, then cover with leaves or pine needles for insulation.
- Tarp Shelter: If you have a tarp or emergency blanket, tie it between trees to make a quick roof over your head.
- Bough Bed: Layer pine boughs or dry leaves on the ground to keep your body off cold earth.
Shelter Checklist
- Is it dry?
- Is it protected from wind?
- Away from obvious dangers?
- Visible enough for rescuers to spot?
- Sufficient insulation between you and the ground?
If you focus on staying warm, dry, and visible, your chances of staying safe until rescue will be much higher.
4. Sourcing Safe Water
Why Finding Water Matters
If you’re lost in the woods, finding safe water is a top priority. The human body can go weeks without food, but only a few days without water. In the American backcountry, streams, rivers, and even puddles can be lifesavers—but drinking untreated water can make you sick.
How to Locate Water in the Woods
- Follow the Terrain: Water flows downhill. Look for valleys, ravines, or animal trails that may lead to streams or ponds.
- Listen for Sounds: Early morning or quiet times are best for hearing the sound of running water nearby.
- Look for Greenery: Lush, green plants often grow near water sources. Willow and cottonwood trees are good signs in many parts of the U.S.
- Check Rock Outcrops: Sometimes water seeps out from between rocks—check shaded areas or rock faces.
- Dew Collection: In dry areas, use a clean cloth or shirt to wipe dew off grasses and leaves early in the morning, then wring it into a container.
Basic Wilderness Water Purification Methods
No matter how clean a stream looks, always purify before drinking. Here’s a quick guide to common methods:
| Method | How To Do It | Pros | Cons |
|---|---|---|---|
| Boiling | Bring water to a rolling boil for at least 1 minute (3 minutes above 6,500 feet) | Kills all pathogens | Needs fire and container; time-consuming |
| Water Filters | Pump or squeeze water through a backpacking filter (available at outdoor stores) | Removes bacteria & protozoa; fast | Can clog; doesn’t remove viruses unless specified |
| Chemical Tablets/Drops | Add iodine/chlorine tablets or drops; wait as directed (usually 30 min) | Lightweight; easy to carry | Taste; not effective against some parasites |
| Solar Disinfection (SODIS) | Fill clear plastic bottle; leave in full sun for 6+ hours | No gear needed except bottle; low effort | Takes long time; only works in sunny weather; not for cloudy/murky water |
| Improvised Filters (if desperate) | Layer sand/charcoal/cloth in a container and pour water through it several times | Makes muddy water clearer; removes debris | Does NOT kill germs; must still boil or disinfect after filtering! |
American Backcountry Tips
- If you have no filter or pot, consider using bandanas or shirts as pre-filters before boiling or treating.
- Avoid stagnant ponds and swamps—moving water is usually safer.
- If you find snow (common in higher elevations like the Rockies), melt it before drinking—never eat snow directly as it can lower your body temperature dangerously.
- Avoid drinking unpurified water from sources near campsites, cattle pastures, or mining areas due to contamination risks.
- If possible, carry a small metal cup and lighter/matches when hiking in remote U.S. forests—they make boiling much easier.
Stay Hydrated, Stay Smart!
Sourcing safe water is about using what you have and knowing what’s around you. With these practical methods and tips specific to America’s wild places, you’ll keep yourself hydrated and healthy until help arrives—or you find your way out.
5. Orienting Yourself and Navigating Safely
Getting lost in the woods can be scary, but staying calm and orienting yourself is key to finding your way or staying safe until help arrives. Here’s how you can use basic navigation skills and make smart decisions about whether to stay put or move.
Using Natural Landmarks
Look around for noticeable features such as rivers, mountains, large rocks, or unique trees. These natural landmarks can help you keep your bearings and avoid walking in circles. If you spot a river or stream, following it downstream often leads to signs of civilization like roads or bridges.
Common Natural Landmarks and Their Uses
| Landmark | How It Helps |
|---|---|
| River/Stream | Follow downstream; may lead to roads or towns |
| Mountain/Hill | Climb for a better view (if safe) to spot trails or clearings |
| Clearing/Meadow | Easier for rescuers to spot you; good place to signal for help |
| Unique Tree/Rock Formation | Use as a reference point so you don’t walk in circles |
Navigating with a Compass
If you have a compass, it’s your best friend when lost. First, pick a direction you want to go (like north). Hold the compass flat and turn your body until the needle points north. Then choose a landmark in that direction and walk toward it. Repeat this process with each new landmark to keep from veering off course.
Simple Steps for Using a Compass
- Hold the compass flat in your hand.
- Turn until the needle lines up with north.
- Pick something ahead (like a tree) that matches your direction.
- Walk toward it, then repeat as needed.
When to Stay Put vs. When to Move
This is one of the most important decisions if you’re lost:
| If You Should Stay Put… | If You Should Move… |
|---|---|
| You’re injured or exhausted You have no idea where you are You told someone where you were going The weather is getting worse You have enough supplies to wait for help |
You see a clear trail or road You spot water sources nearby You know for sure which direction leads out Your safety depends on moving (wildlife, flooding, etc.) No one knows your location |
Tip:
If you decide to move, leave clear markers behind—like stacked rocks or broken branches—to help rescuers track you down.
6. Staying Nourished and Conserving Energy
If you find yourself lost in the woods, one of your main priorities is to keep your energy up and avoid dangerous foods. Here’s how you can stay nourished and make smart choices while waiting for help.
What Is Safe to Eat?
Not everything in the wild is safe to eat. Some plants and berries can be toxic, and eating the wrong thing can make your situation worse. If you’re not 100% sure something is safe, it’s best to skip it.
| Safe Options (With Caution) | Foods to Avoid |
|---|---|
| Acorns (soak or boil first) | Mushrooms (unless you are an expert) |
| Pine needles (can make tea for vitamin C) | Berries you cant identify |
| Dandelion greens | Plants with milky or colored sap |
| Cattail roots (cook them if possible) | Fungi growing on trees (unless known safe) |
| Wild onions/garlic (smell for confirmation) | Any plant with a bitter or soapy taste |
Important Note:
If you aren’t sure about a plant or berry, don’t eat it. Even small amounts of some wild foods can cause stomach problems or worse.
Managing Your Energy
While food is important, conserving your energy should be your top priority. Most people can go several days without food as long as they stay hydrated. Here are some tips:
- Stay put: Unless you have a clear path out, staying in one spot helps rescuers find you faster and uses less energy.
- Avoid unnecessary movement: Save your strength for when you really need it—like building shelter or signaling for help.
- Keep warm: Use leaves, branches, or extra clothing to insulate yourself from cold ground or wind.
- Pace yourself: If you must move, take breaks often and don’t overexert yourself.
- Don’t stress about food right away: Focus on water first; your body can handle missing meals for a while.
Quick Tip: Hydration Comes First!
If you have limited resources, prioritize finding clean water over food. Dehydration will become a problem much sooner than hunger.
7. Prevention and Preparation for Future Trips
Building Smart Habits Before You Go
Staying safe in the woods starts long before you hit the trail. A few simple habits can make all the difference if you ever get lost or face an emergency. Here’s how to prepare like experienced hikers in the U.S.:
Key Habits to Practice
- Tell Someone Your Plans: Always share your trip details with a trusted friend or family member—include your route, expected return time, and who to call if you’re late.
- Check the Weather: U.S. hikers rely on apps like NOAA Weather and AccuWeather to avoid storms or heatwaves.
- Learn Basic Navigation: Take a short class or watch videos on using a map and compass—even if you plan to use GPS.
- Start Early: Begin hikes early in the day so you have plenty of daylight.
- Stick to Marked Trails: Most U.S. parks have well-marked paths; don’t risk shortcuts.
Essential Gear Recommendations (Popular in the U.S.)
Packing the right gear is one of the best ways to prevent trouble in the woods. Here’s a handy table of what many American hikers carry, with common product examples:
| Item | Purpose | Popular U.S. Example |
|---|---|---|
| Navigation Tools | Find your way if you get lost | Silva Compass, Garmin eTrex GPS |
| Personal Locator Beacon (PLB) | Send SOS signals when there’s no cell service | ACR ResQLink View |
| Map & Waterproof Case | Keeps your route info safe from rain or spills | National Geographic Trail Maps, SealLine Map Case |
| Headlamp or Flashlight | Lose daylight? Stay visible and find your way back safely | Petzl Actik Headlamp, Maglite Mini Flashlight |
| Extra Food & Water | Avoid dehydration and low energy during delays | Nalgene Bottle, Clif Bars, Sawyer Mini Water Filter |
| First-Aid Kit | Treat minor injuries right away | Adventure Medical Kits Mountain Series |
| Emergency Shelter | If you must spend an unplanned night outdoors | SOL Emergency Bivvy, REI Lightweight Tarp |
| Whistle & Signal Mirror | Easier for rescuers to find you by sound or reflection | Coghlan’s Survival Whistle, UST StarFlash Mirror |
Packing Tips from Experienced Hikers
- Edit Your Pack: Lay out your gear before packing—bring only what’s essential for your trip length and location.
- Practice With Your Gear: Test new equipment at home so you know how it works under pressure.
The Bottom Line: Prevention Pays Off
The best way to stay safe is to avoid getting lost in the first place. Developing these simple habits and packing smart means you’ll be ready for almost anything nature throws at you.

