1. Introduction to Dutch Oven Bread in the Wild
If you’ve ever dreamed of baking fresh, crusty bread under the open sky, you’re not alone. Dutch oven bread baking has become a favorite ritual for campers, hikers, and outdoor lovers across America. It’s more than just a way to make food—it’s an experience that brings people together around the fire.
Why Bake Bread Outdoors?
Baking bread in a Dutch oven outdoors combines the joys of campfire cooking with the satisfaction of homemade bread. The process is simple but feels magical—just flour, water, yeast, and salt transforming into golden loaves as you watch the flames dance. This tradition is beloved for a few reasons:
| Appeal | Description |
|---|---|
| Flavor | Wood smoke and cast iron give bread a rustic taste that’s hard to replicate indoors. |
| Community | Sharing warm, fresh bread at camp creates instant camaraderie. |
| Simplicity | You only need basic ingredients and gear—no fancy kitchen required. |
| Tradition | Dutch oven baking has roots in American frontier history and is still going strong today. |
The Dutch Oven: An Outdoor Icon
The cast iron Dutch oven is as American as apple pie. Rugged and reliable, it’s been used for centuries by pioneers, cowboys, and modern-day adventurers alike. Its heavy lid traps heat and moisture, creating perfect conditions for baking artisan-style bread even in the wilderness.
What Makes It Special?
- Even heating from all sides
- Durable enough for open flames or hot coals
- Versatile—great for stews, roasts, and desserts too!
A Beloved Campfire Tradition
Whether you’re on a family camping trip or backpacking through national parks, Dutch oven bread baking is about slowing down and savoring simple pleasures. It’s no wonder this method remains a staple among American outdoor enthusiasts—each loaf tells a story of adventure, patience, and community.
2. Choosing the Right Gear and Ingredients
Baking bread in the wild is an adventure, but it all starts with having the right gear and ingredients. In this section, we’ll break down what to look for in a Dutch oven, how to pick simple and accessible ingredients, and which essential tools will make your bread baking experience smooth and enjoyable—even when you’re far from home.
Selecting a Quality Dutch Oven
Your Dutch oven is the star of the show. Here’s what to consider:
| Feature | Why It Matters |
|---|---|
| Material (Cast Iron) | Retains heat evenly, perfect for crusty bread. |
| Size (4-6 Quart) | Big enough for most loaves, not too heavy to carry. |
| Lid Fit | A tight lid helps trap steam—key for great crust. |
| Handles | Large, sturdy handles are safer over a campfire. |
| Pre-Seasoned | Easier clean-up and better non-stick surface. |
Sourcing Accessible Ingredients
You don’t need fancy flour or hard-to-find yeast to bake awesome bread in the wild. Here’s a basic ingredient list that’s easy to pack or find at any American grocery store:
- All-purpose flour (or bread flour if you prefer chewier bread)
- Active dry yeast (packets are lightweight and convenient)
- Salt (regular table salt works fine)
- Water (filtered or bottled, especially if you’re in the backcountry)
- Optional: sugar or honey for a touch of sweetness
Tip:
If you want to level up your loaf, toss in some extras like herbs, shredded cheese, or seeds—just keep it simple if weight and space are concerns.
Gathering Essential Tools for Wild Bread Baking
The right tools will make your outdoor bread adventure much easier. Here’s what to pack:
| Tool | Purpose |
|---|---|
| Parchment Paper | Makes lifting dough easy and prevents sticking. |
| Mixing Bowl (Collapsible or Metal) | For mixing and proofing dough. |
| Measuring Cups & Spoons | Accurate measurements for consistent results. |
| Dough Scraper or Wooden Spoon | Keeps hands clean when mixing. |
| Oven Mitts or Heat-resistant Gloves | Safety first! Handling hot cast iron requires protection. |
| Charcoal Briquettes or Firewood | Your heat source for baking. Charcoal gives consistent temps; wood adds flavor. |
| Lid Lifter or Tongs | Makes checking your bread safe and easy. |
Pro Tip:
If you’re short on space, improvise! A clean bandana can double as an oven mitt in a pinch, and a sturdy stick can help move coals around your Dutch oven safely.
3. Preparing Your Bread Dough Off-Grid
Baking bread outdoors doesn’t need to be complicated—even when you’re away from the comforts of your home kitchen. Here’s a straightforward, no-fuss bread recipe perfect for wild adventures, using minimal equipment and ingredients you can easily pack.
Simple Ingredients, Simple Tools
| Ingredient | Amount | Notes |
|---|---|---|
| All-purpose flour | 3 cups | Substitute whole wheat for a denser loaf if preferred |
| Warm water | 1 1/2 cups | Aim for just above room temperature (not hot) |
| Salt | 1 1/2 teaspoons | |
| Instant yeast (or active dry yeast) | 1 teaspoon | If using active dry, dissolve in water first |
| Sugar or honey (optional) | 1 tablespoon | Adds a touch of sweetness; helps with browning |
| Mixing bowl or sturdy pot | 1 | If you didn’t bring a bowl, a clean Dutch oven works too! |
| Spoon or your hands for mixing | ||
| Towel or cloth to cover dough | A bandana or clean T-shirt works in a pinch |
Step-by-Step Outdoor Dough Prep
- Add Dry Ingredients: Pour flour, salt, and yeast into your mixing bowl. Give them a quick stir to combine.
- Add Wet Ingredients: Slowly pour in warm water (and sugar/honey if using). Stir with a spoon—or dive in with clean hands—until everything comes together. The dough should look shaggy but stick together without being soupy.
- Knead Lightly: Knead the dough gently right in the bowl or on a flat, clean surface (like an upside-down lid or cutting board). Outdoors, less is more: work it just until it forms a rough ball (about 2-3 minutes).
- Let It Rise: Cover the bowl with your towel, cloth, or whatever you have handy. Set it somewhere out of direct sunlight but warm enough to help it rise—next to your campfire (not too close), inside your tent during the day, or wrapped up in your sleeping bag at night.
- Proofing Time: Let the dough rest until it doubles in size. Depending on outdoor temps, this could take anywhere from 45 minutes to 2 hours. Cooler weather? Give it extra time and don’t stress!
- Punch Down & Shape: Once risen, gently deflate the dough by pressing down with your fist. Shape into a round loaf that’ll fit in your Dutch oven.
- Second Rest: Let the shaped loaf rest for another 15-30 minutes while you prep your Dutch oven and coals for baking.
No Fridge? No Problem!
If you need to slow down the process (say you want fresh bread for breakfast), cover the dough tightly and place it somewhere cooler—like near a creek or under shade—to retard the rise overnight.
4. Building and Managing Your Campfire Heat
Setting Up the Perfect Cooking Fire
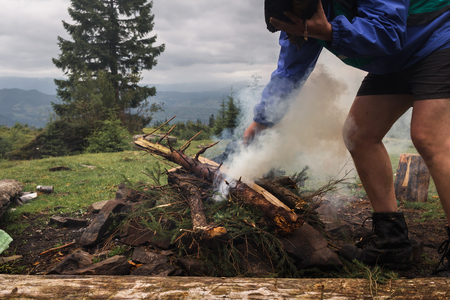
When baking bread in the wild with your Dutch oven, your campfire is your kitchen. It’s all about getting the right heat and keeping it steady. Start by picking a safe, open spot away from dry grass or low-hanging branches. Clear a circle of dirt or rocks for your fire ring. Use dry hardwood like oak, hickory, or maple—these burn hot and make great coals for baking.
Steps to Build a Good Cooking Fire
- Lay the foundation: Make a small pile of tinder (dry leaves, twigs, or paper) in the center of your fire ring.
- Add kindling: Stack pencil-sized sticks over your tinder in a teepee or log cabin shape.
- Build up: Once your kindling catches, add thicker sticks and small logs gradually.
- Create coals: Let the fire burn down until you have a glowing bed of coals—this takes 30–60 minutes.
Controlling Temperature with Coals
Baking bread in a Dutch oven is all about even heat—not too hot, not too cold. You don’t want big flames licking at your pot. Instead, cook with coals from either wood or charcoal briquettes. Here’s a quick guide to help you manage the heat:
| Heat Level | # of Coals on Top | # of Coals Underneath | Bread Results |
|---|---|---|---|
| Low | 6-8 | 4-5 | Softer crust, longer bake time |
| Medium | 10-12 | 7-9 | Crispy crust, good rise |
| High | 14-16 | 10-12 | Darker crust, risk of burning |
Pro Tips for Even Heat Distribution
- Rotate your Dutch oven every 10–15 minutes—turn the pot one way and the lid the other for balanced baking.
- Add fresh coals as needed to keep your temperature steady; wind and weather can affect how fast they burn down.
- If you’re using wood coals, rake some under the oven and heap more on top for that golden brown finish.
Safely Handling Your Dutch Oven in Nature
Casting iron gets seriously hot! Always use leather gloves or thick potholders when lifting or turning your Dutch oven. For extra stability, use long-handled tongs or a Dutch oven lid lifter when checking your bread. When you’re done baking, let everything cool before cleaning up—and always make sure your fire is fully extinguished before leaving camp.
5. Baking Bread: Dutch Oven Techniques
Getting Your Dutch Oven Ready
Baking great bread in the wild starts with a well-prepared Dutch oven. First, preheat your Dutch oven by placing it over hot coals for about 20-30 minutes before baking. This helps create that golden, crusty exterior everyone loves. Make sure the lid is hot too—it traps steam, which is key for a crispy crust.
Step-by-Step Outdoor Bread Baking
- Shape Your Dough: After your dough has risen, gently shape it into a round loaf. Let it rest while your Dutch oven heats up.
- Add Parchment Paper (Optional): For easy cleanup and to prevent sticking, place your dough on a piece of parchment paper.
- Carefully Transfer the Dough: Using heat-resistant gloves, remove the lid, place the dough inside, and quickly cover it again to keep in the heat.
- Position Over Coals: Set your Dutch oven over a bed of glowing coals. Place more coals on top of the lid for even baking. A good rule of thumb is two-thirds of your coals on top and one-third below.
- Bake Time: Bake for 25-35 minutes. Check around the 20-minute mark—if you want an extra-crispy crust, remove the lid for the last 10 minutes.
Coal Management Tips
| Oven Size (Quart) | Total Charcoal Briquettes | Beneath Oven | On Lid |
|---|---|---|---|
| 8 Quart | 24 | 8 | 16 |
| 10 Quart | 30 | 10 | 20 |
| 12 Quart | 36 | 12 | 24 |
Troubleshooting Common Issues in the Wild
- Dough Sticks to Oven: Always preheat and use parchment or sprinkle flour/cornmeal at the bottom.
- Bread Burns on Bottom: Move some coals from underneath to the lid, or elevate your Dutch oven slightly with rocks.
- Bread Not Browning: Add more coals to the top or remove the lid for the last few minutes.
- Dough Not Rising Well: Wild temperatures can vary; let dough rise longer if its cold out, or move it closer to a warm spot (but not directly over fire).
Pro-Tips for Even Baking Outdoors
- Rotate Your Oven: Turn both the lid and pot 90 degrees every 10-15 minutes for even heat distribution.
- Aim for Steady Heat: Keep extra coals handy to add as needed—don’t let things cool down too much during baking.
- No Thermometer? No Problem: Tap the loaf—if it sounds hollow, it’s done! Or check if an inserted stick comes out clean.
- If Rain Hits: Use a tarp or campfire tripod to shield your setup from sudden weather changes.
6. Serving and Enjoying Your Wild-Baked Bread
Gather Around the Campfire: Sharing Fresh Bread
One of the best parts about baking bread in a Dutch oven out in the wild is sharing it right there, fresh and hot, with your camp buddies. Tear or slice your loaf and let everyone grab a piece—no fancy plates needed! Here are some creative, American-inspired ways to enjoy your bread under the open sky:
Classic Campfire Pairings
| Pairing Idea | Description |
|---|---|
| Cowboy Butter | Melt butter with garlic, parsley, and a pinch of chili flakes for dipping warm slices. |
| PB&J Bar | Set out peanut butter, jelly, honey, and apple slices for DIY sandwiches. |
| Chili Bread Bowl | Scoop out the center of a thick slice and fill it with hot campfire chili. |
| Smores Style | Spread chocolate and marshmallow fluff on toasted bread for a fun twist. |
| Breakfast Sandwiches | Layer scrambled eggs, bacon, and cheese between bread halves for a hearty start. |
How to Serve: Practical Tips
- If you have a serrated knife, use it for clean slices; otherwise, just tear rustic chunks by hand.
- Wrap portions in clean cloths or napkins to keep them warm as you pass them around.
- For extra flavor, toast slices over the fire using a grill grate or stick—just watch them closely!
Campfire Fun: Get Creative with Toppings & Dips
Make serving interactive by offering simple toppings like local honey, jam packets, or even campfire-cooked sausage slices. Encourage everyone to build their own favorite combo—it’s all about enjoying good food together in nature.
Leftover Bread? Here’s How to Store It Right
- Cool Completely: Let the bread cool before wrapping to avoid sogginess from trapped steam.
- Wrap Tight: Use foil, beeswax wraps, or resealable bags to keep air out. If you have a cooler, store bread inside to stay fresh longer.
- Next-Day Ideas: Turn stale pieces into campfire toast, croutons for soup, or hearty French toast on your skillet.
Bread Storage Cheat Sheet
| Bread Condition | Best Storage Method |
|---|---|
| Fresh & Warm | Wrap in cloth or towel; eat within a few hours. |
| Cooled Down (same day) | Tightly wrap in foil or beeswax wrap; store in shaded area. |
| Leftovers (overnight) | Airtight container or resealable bag in cooler if possible. |
| Slightly Stale | Toast over fire or cube for soup/croutons next meal. |
No matter how you serve it up or save what’s left, wild-baked Dutch oven bread always brings folks together. Don’t be afraid to make it your own with whatever you’ve packed along!