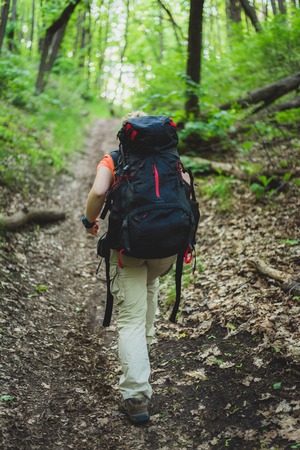
Choosing the Right Backpack
Efficient packing begins long before you lay out your gear—it starts with selecting the right backpack. Your pack should fit your body comfortably and match the type of adventure you’re planning, whether it’s a weekend hike in the Rockies or a weeklong trek through Yosemite. Look for adjustable straps, a supportive hip belt, and a frame that matches your torso length. Make sure the capacity fits your trip’s needs without encouraging overpacking; 40–60 liters is ideal for most multi-day trips. Try on several options at your local outdoor store and ask for help fitting it properly. A well-chosen backpack lays the groundwork for balance, accessibility, and comfort on the trail, making every mile feel lighter.
2. Laying Out Your Gear
Before you start packing your backpack, spread out all your gear in one spot. This simple step helps you see everything at a glance and avoid forgetting essentials. Organizing your items by category makes it easier to pack and access things later. Divide your gear into logical groups: shelter, clothing, food, water, cooking tools, first aid, and miscellaneous items like maps or headlamps.
Group Essentials for Easy Packing
| Category | Examples |
|---|---|
| Shelter | Tent, tarp, stakes |
| Clothing | Jacket, base layers, socks |
| Food & Water | Snacks, meals, water filter |
| Cooking Gear | Stove, fuel, pot |
| First Aid | Kit, medications |
| Miscellaneous | Map, flashlight, multitool |
Layer by Use and Accessibility
Think about when youll need each item on the trail. Place the things you’ll use most often—like snacks or rain jackets—in an easy-to-reach pile. Heavier or less-used gear can go toward the back of your layout for deeper storage in your pack. Layering this way helps you grab what you need without unpacking everything.
Create a Quick-Check List
A checklist keeps you from leaving anything behind. After laying out your grouped gear, run through each category and double-check that every essential is accounted for. Taking a few minutes to organize now saves time and stress later on the trail.
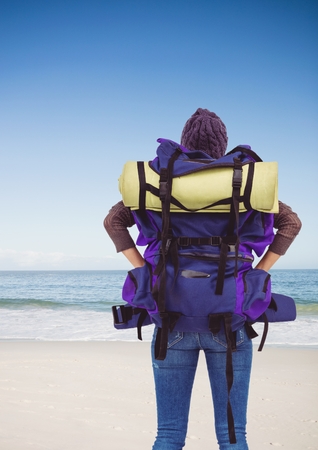
3. Weight Distribution Basics
Mastering weight distribution is key to hiking comfortably and safely. Start by placing your heaviest items—like food, water, and cooking gear—close to your back and centered between your shoulder blades. This keeps your core stable and prevents the pack from pulling you backward. Medium-weight items, such as extra clothes or a tent, should go around the heavier gear, helping cushion and support the load. Lighter essentials, like a sleeping bag or jacket, fit best at the bottom of your backpack. Always balance items side-to-side to avoid straining one side of your body. Remember: a well-packed backpack feels lighter and moves with you, reducing fatigue and lowering the risk of injury on uneven trails.
4. Maximizing Accessibility
When you’re out on the trail, having quick access to essentials can make your hike smoother and safer. To maximize accessibility, organize your backpack so that must-have items are easy to grab without unloading everything. Think of what you’ll need for short breaks or sudden changes in weather. Place these items in external pockets, top compartments, or near the opening of your pack.
Strategic Placement of Essentials
| Item | Recommended Location |
|---|---|
| Snacks/Energy Bars | Hip belt pockets or top lid |
| Water Bottle/Filter | Side pockets or hydration sleeve |
| Map/Compass/GPS | Front pocket or top lid |
| Sunscreen/Lip Balm | Easily accessible outer pocket |
| Rain Jacket/Poncho | Top of main compartment or external stuff pocket |
Quick Access Tips
- Use color-coded dry bags for small essentials inside your pack.
- Keep a small first-aid kit within reach, not buried deep.
- If hiking with others, coordinate who carries shared gear for easier access.
Stay Organized, Stay Efficient
Packing with accessibility in mind saves time and minimizes frustration during short stops. By intentionally placing high-use items where you can reach them quickly, you keep your momentum on the trail and stay prepared for whatever nature brings.
5. Packing Techniques for Efficiency
Mastering the art of packing is key to making your backpack both compact and organized. Using a combination of rolling, folding, and stuffing can help you maximize every inch of space and keep your gear accessible. Rolling clothes tightly minimizes wrinkles and fits them neatly into corners or between larger items. Folding works best for bulkier pieces like jackets or pants that need a flat shape, helping create a stable base layer in your pack. For items like socks, underwear, or compressible layers, stuffing them into shoes or side pockets fills gaps and prevents shifting while you hike. By mixing these methods, you’ll maintain a tidy load that’s easy to unpack at camp or on the trail. Remember, efficient packing isn’t just about saving space—it’s about creating a system where you know exactly where everything is when you need it.
6. Final Checks and Adjustments
Before you head out, take a moment for a final gear sweep. Double-check that everything you need is packed and nothing essential is left behind—think first aid kit, snacks, water, and navigation tools. Make sure your backpack zippers are closed and straps are secured. Next, put your pack on and fine-tune the shoulder straps, hip belt, and load lifters so the weight sits comfortably against your body. Walk around for a minute or two; if anything feels off-balance or pinches, adjust until it feels right. These small tweaks make all the difference on the trail. Take a deep breath—now you’re ready to move in harmony with nature, knowing your pack is balanced and accessible.