1. Why Lightweight Tents Matter for Backpacking
When youre backpacking through Americas vast and beautiful national parks, like the Pacific Crest Trail or Appalachian Trail, every ounce in your pack counts. Choosing a lightweight tent can make a huge difference in your overall experience—helping you hike longer distances with less fatigue and more comfort.
Backpacking vs. Car Camping: Whats the Difference?
Before diving into the benefits of lightweight tents, its important to understand how backpacking differs from car camping. Heres a quick comparison:
| Feature | Backpacking | Car Camping |
|---|---|---|
| Mode of Travel | On foot, carrying all gear | Drive-up access to campsite |
| Tent Weight | Lightweight is essential | Weight is less of a concern |
| Campsite Type | Remote, often undeveloped areas | Established campgrounds with amenities |
The Real-World Benefits of Lightweight Tents on Long Trails
If youre planning to hike trails like the Pacific Crest Trail (PCT), which stretches over 2,600 miles from California to Washington, or the Appalachian Trail (AT), which runs more than 2,100 miles from Georgia to Maine, youll quickly realize that shaving off a few pounds from your gear matters. A heavy tent can slow you down and drain your energy—especially on steep climbs or multi-day treks.
Lightweight tents are designed for efficiency. Theyre compact, easy to set up, and built with durable materials that won’t weigh you down. This allows you to move quicker, reduce strain on your body, and enjoy the journey rather than just surviving it.
Top Reasons to Go Lightweight:
- Less Fatigue: Carrying less weight means less stress on your knees, back, and shoulders.
- More Miles Per Day: A lighter load helps you cover greater distances without wearing out.
- Easier Setup: Lightweight tents often feature simple designs perfect for solo hikers or quick setups before nightfall.
- Packs Smaller: Save space in your backpack for other essentials like food, water, or extra layers.
Did You Know?
The average long-distance backpacker aims to keep their base weight under 20 pounds—and tents are one of the heaviest single items. Choosing a tent under 3 pounds can significantly lighten your load and improve your trail performance.
If you’re planning an extended adventure across national parks or tackling iconic thru-hikes, investing in a quality lightweight tent isn’t just about convenience—it’s about making the whole journey more enjoyable and achievable.
2. Key Features to Look for in a Backpacking Tent
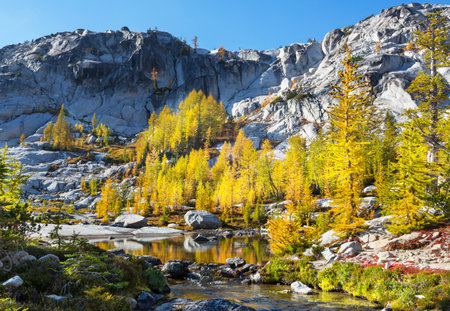
When youre backpacking across Americas breathtaking national parks—whether its Yosemite, Glacier, or the Great Smoky Mountains—the right tent can make all the difference. Choosing a lightweight tent isnt just about saving your shoulders; its about comfort, protection, and convenience in the great outdoors. Here are the key features to keep in mind when picking your ideal backpacking tent:
Packed Weight
Weight is a top priority for backpackers. Every ounce matters when youre hiking miles through rugged terrain. Most ultralight tents weigh between 2 to 4 pounds, which is ideal for solo hikers or minimalist duos. If youre trekking in groups or want more comfort, you might carry slightly heavier options—but try to stay under 5 pounds.
| Capacity | Ultralight Range (lbs) | Recommended Max Weight (lbs) |
|---|---|---|
| 1-Person | 1.5 – 2.5 | 3 |
| 2-Person | 2 – 3.5 | 4 |
| 3-Person | 3 – 5 | 5.5 |
Weather Resistance
The U.S. has diverse climates—from the dry heat of Arizona to the rain-soaked forests of Washington state—so your tent should be ready for anything. Look for tents with high-quality waterproof coatings (like silicone or polyurethane), taped seams, and sturdy rainfly coverage. A good three-season tent will handle most American park conditions unless youre heading into snow-covered areas, where a four-season tent may be necessary.
Ease of Setup
After a long day on the trail, the last thing you want is a complicated tent setup. Freestanding tents are popular because they’re fast to pitch and don’t require perfect ground conditions. Color-coded poles and quick-clip attachments also make life easier, especially if youre setting up at dusk or during bad weather.
Ventilation
No one likes waking up in a tent dripping with condensation. That’s why proper airflow is essential—especially in humid parks like Everglades or Shenandoah. Look for tents with mesh panels, adjustable vents, and double-wall construction that allow air to circulate without letting bugs or rain in.
Quick Ventilation Checklist:
- Mesh canopy and side panels: Keeps bugs out while allowing airflow
- Adjustable roof vents: Helps release warm air overnight
- Double-wall design: Reduces condensation buildup inside the tent
Packing Size and Shape
A compact packed size means more room in your backpack for other essentials. Some tents come with compression stuff sacks or can be split between two hikers to share the load evenly.
Tent Size Comparison Table:
| Tent Type | Packed Dimensions (inches) | Best For |
|---|---|---|
| 1-Person Ultralight | 16 x 5 x 5 | Solo hikers looking to save space and weight |
| 2-Person Lightweight | 18 x 6 x 6 | Couples or friends sharing gear loads |
| Freestanding Dome Tent (3P) | 22 x 7 x 7 | Trekking groups seeking comfort with extra space |
Selecting the right backpacking tent involves balancing weight with durability, comfort, and ease of use—especially when exploring America’s diverse national parks. Keep these features in mind to make sure your shelter keeps up with every mile of your journey.

3. Top Lightweight Tent Picks for National Park Adventures
When youre backpacking through Americas stunning national parks—from the alpine trails of Glacier to the desert landscapes of Zion—having a lightweight, reliable tent can make all the difference. Heres a roundup of top-rated, trail-tested tents that are built to handle the diverse terrains and climates across the U.S.
Best Overall Lightweight Tent
Big Agnes Copper Spur HV UL2
This fan-favorite ultralight tent is a go-to for many backpackers due to its perfect balance of weight, space, and durability. It performs well in both high-elevation chill and humid summer nights, making it ideal for parks like Yosemite, Rocky Mountain, or Shenandoah.
- Weight: 3 lbs 2 oz (packed)
- Capacity: 2-person
- Features: Dual vestibules, steep walls for more headroom, easy setup
Top Pick for Harsh Weather
NEMO Hornet Elite OSMO 2P
If youre planning a trip to windier or wetter regions like Olympic National Park or the Tetons, this tent offers excellent protection without adding bulk. Its OSMO fabric resists sagging in wet conditions and dries quickly.
- Weight: 2 lbs 1 oz (packed)
- Capacity: 2-person
- Features: Waterproof OSMO fabric, minimal pole structure, good ventilation
Budget-Friendly Lightweight Option
REI Co-op Quarter Dome SL 1
This solo tent is a great choice for budget-conscious hikers exploring trails in parks like Great Smoky Mountains or Acadia. Its light enough for long treks while still offering comfort and weather resistance.
- Weight: 2 lbs 6 oz (packed)
- Capacity: 1-person
- Features: Easy setup, good airflow, solid weather protection
Simplified Comparison Table
| Tent Model | Packed Weight | Capacity | Best For |
|---|---|---|---|
| Big Agnes Copper Spur HV UL2 | 3 lbs 2 oz | 2-person | All-around performance across most national parks |
| NEMO Hornet Elite OSMO 2P | 2 lbs 1 oz | 2-person | Wet & windy conditions (e.g., Olympic, Tetons) |
| REI Co-op Quarter Dome SL 1 | 2 lbs 6 oz | 1-person | Bargain option for solo hikers in moderate climates |
No matter which national park you plan to visit—whether its the rugged peaks of North Cascades or the red rock canyons of Arches—choosing the right lightweight tent ensures your backpacking adventure is safe and enjoyable. The tents listed above are proven favorites among experienced hikers and are built to support your journey wherever the trail takes you.
4. Comparing Single-Wall vs. Double-Wall Tents
When choosing the best lightweight tent for backpacking across U.S. national parks, understanding the difference between single-wall and double-wall tents is key. Each design has its own strengths and weaknesses, especially when youre dealing with varying conditions like humidity, temperature swings, and changes in elevation.
What’s the Difference?
A single-wall tent combines the rainfly and inner tent into one layer, while a double-wall tent has two separate layers: an inner breathable canopy and an outer waterproof rainfly. This structural difference affects everything from weight to ventilation.
Pros and Cons
| Single-Wall Tent | Double-Wall Tent | |
|---|---|---|
| Weight | Lighter overall; great for ultralight backpacking | Slightly heavier due to extra materials |
| Packed Size | More compact; saves space in your pack | Takes up more room in your backpack |
| Setup Time | Faster; fewer components to deal with | Takes longer; more steps involved |
| Ventilation | Poorer airflow; prone to condensation in humid areas | Better airflow; reduces interior moisture buildup |
| Weather Protection | Simpler design can struggle in heavy rain or snow | Offers better protection in varied conditions |
Choosing Based on Conditions in National Parks
The right choice depends on where youre headed and what time of year youre going:
Humidity
If youre trekking through humid parks like Great Smoky Mountains or Olympic National Park, a double-wall tent is usually the better option. The extra layer helps prevent condensation inside your shelter.
Temperature Swings
Parks like Grand Canyon or Yosemite can have warm days and cold nights. A double-wall tent gives you better insulation and breathability, helping you stay comfortable around the clock.
Elevation
If youre climbing to higher elevations in places like Rocky Mountain or Glacier National Park, temperatures drop and winds pick up. A double-wall design offers more stability and warmth. However, if weight is a top priority for long uphill climbs, a single-wall may be worth considering—as long as you’re prepared to manage condensation.
The Bottom Line on Design Choice
If youre all about going fast and light, and expect dry weather or are confident in your ability to manage moisture, a single-wall tent could be your go-to. But if comfort, versatility, and performance in unpredictable weather are top priorities—especially in national parks where conditions can change quickly—a double-wall tent is usually the safer bet.
5. Tips for Backpacking Campsite Selection in National Parks
When backpacking through America’s national parks with a lightweight tent, choosing the right campsite is just as important as selecting the tent itself. A good site ensures your safety, protects the environment, and gives you the best possible experience. Heres how to find a great spot that aligns with Leave No Trace principles and follows park regulations.
Follow Park Regulations First
Each national park has its own rules about where you can camp. Some require backcountry permits, while others have designated zones. Before heading out, visit the official website of the park or stop by a ranger station to get updated info on:
- Camping zones and prohibited areas
- Permit requirements
- Campfire restrictions
- Wildlife safety guidelines
Leave No Trace Principles
These seven principles help keep our wild spaces beautiful and healthy. When picking your campsite, pay close attention to these key ideas:
- Travel & Camp on Durable Surfaces: Set up your tent on rock, gravel, dry grasses, or established sites to avoid damaging fragile vegetation.
- Dispose of Waste Properly: Pack out all trash, leftover food, and litter.
- Respect Wildlife: Store food securely and never feed animals.
What Makes a Good Campsite?
A quality backpacking campsite should be safe, low-impact, and comfortable. Here are some things to look for when setting up your lightweight tent:
| Criteria | Description |
|---|---|
| Flat Ground | Avoid slopes—look for level areas to prevent sliding during sleep. |
| Sheltered Spot | Trees or boulders can offer wind protection but avoid camping directly under dead limbs (widowmakers). |
| Distance from Water | Camp at least 200 feet away from lakes or streams to prevent erosion and protect wildlife habitats. |
| No Existing Damage | If an area looks heavily used or degraded, find another spot to reduce impact. |
Campsite Safety Tips
- Avoid low-lying areas where water may collect during rainstorms.
- Stay clear of animal trails or thick brush where wildlife may roam.
- If youre in bear country, use bear canisters and store them at least 100 feet from your sleeping area.
Pro Tip:
If you’re hiking in a group, spread out tents rather than clustering them all in one spot. This minimizes environmental stress and provides more privacy for everyone.