Weather-Appropriate Shelter
When winter camping in the U.S., your shelter is your first line of defense against harsh elements. Choosing the right four-season tent is non-negotiable for safety and comfort. Four-season tents are engineered to handle heavy snow loads, fierce winds, and frigid temps—unlike their three-season cousins, which simply won’t cut it when things get gnarly. Look for a sturdy pole structure, reinforced seams, and low-profile designs that shed snow easily.
Beneath your tent, always lay down a high-quality ground tarp or footprint. This essential barrier protects you from frozen, wet ground and adds an extra layer of insulation to keep warmth from escaping overnight. Make sure the tarp doesn’t extend beyond the edges of your tent to avoid collecting water or melting snow underneath.
Accessories matter too: invest in sturdy snow stakes or deadman anchors instead of standard tent pegs—they’ll hold fast when wind howls and drifts pile up. Consider bringing an extra rainfly for added protection, and pack a repair kit with duct tape, seam sealer, and spare parts; in the backcountry, even small gear failures can quickly become big problems. With the right shelter setup dialed in, you’re ready to face whatever winter throws your way.
2. Cold-Weather Sleeping System
Staying warm at night is non-negotiable when winter camping in the U.S., where sub-zero temps and unpredictable weather are the norm. Your cold-weather sleeping system is your first line of defense against hypothermia and sleepless nights. Here’s how to build a bombproof setup that ensures you wake up rested and ready for adventure.
Choose the Right Sleeping Bag
Opt for a sleeping bag specifically rated for temperatures lower than you expect to encounter—err on the side of caution. Down bags offer excellent warmth-to-weight ratio but require care if moisture is a risk, while synthetic bags perform better in wet conditions common in places like the Pacific Northwest or Northeast.
Sleeping Bag Temperature Ratings Comparison
| Temperature Rating (°F) | Recommended Use |
|---|---|
| 0°F to -20°F | Extreme cold, high-altitude expeditions, Upper Midwest/Alaska winters |
| 0°F to 20°F | Typical winter camping across most U.S. regions |
| 20°F to 32°F | Milder climates or shoulder season trips in Southern states |
Insulated Sleeping Pads Matter
Your pad does more than provide comfort—it insulates you from the frozen ground. Look for sleeping pads with a high R-value (at least 4.0 for winter camping). Layering a closed-cell foam pad under an inflatable insulated pad is a pro move for added warmth and backup if one fails.
Sleeping Pad R-Value Guide
| R-Value | Season/Condition |
|---|---|
| 1–3 | Summer/indoor use only |
| 4–5.5 | Winter camping, moderate snow cover |
| 5.5+ | Extreme cold, deep snow, alpine conditions |
Liners and Extras for Extra Warmth
Add a sleeping bag liner made from fleece or thermal material to boost warmth by up to 10–15°F without much extra weight. Don’t forget essentials like a pillow, dry socks, and a hat for overnight comfort—these small details make a big difference when temps drop fast.
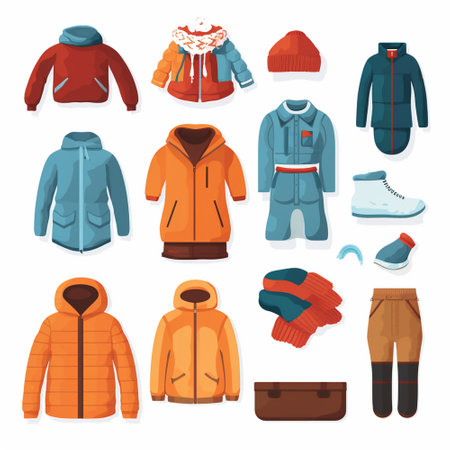
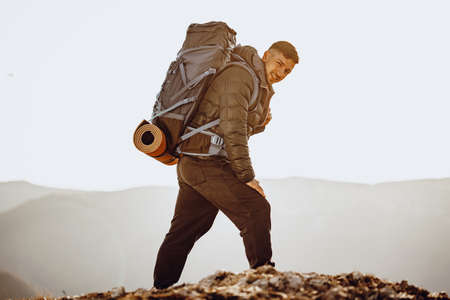
3. Layered Clothing and Footwear
When winter camping, your survival and comfort hinge on mastering the art of layering. Start with a solid base layer—think moisture-wicking thermal tops and bottoms made from merino wool or synthetic materials. This keeps sweat off your skin, preventing that bone-chilling dampness. Next up is your mid layer, which should provide insulation; fleece jackets or down vests are go-to choices for trapping precious body heat without adding bulk.
Your outer layer is your shield against Mother Nature’s fury. Invest in a waterproof and windproof shell jacket and pants—look for gear with breathable membranes like Gore-Tex to keep you dry without overheating during high-output activities. Don’t forget your legs; insulated, water-resistant pants are just as crucial as what covers your upper body.
Footwear can make or break your winter adventure. Choose insulated, waterproof boots rated for subzero temps. Make sure they’re roomy enough for thick socks but snug enough to avoid blisters. Pair them with wool socks; always pack extra pairs in case one gets wet. Avoid cotton—it holds moisture and will leave you freezing.
No checklist is complete without essential accessories: warm gloves or mittens (preferably waterproof), a wool beanie or trapper hat to prevent heat loss through your head, and a neck gaiter or balaclava for full-face protection when winds pick up. Remember, layering isn’t just about staying warm—it’s about staying safe in unpredictable winter conditions.
4. Field-Tested Cooking Equipment
When you’re winter camping, your cooking gear isn’t just about convenience—it’s your lifeline. Frigid temps can sap stove performance, freeze fuel lines, and turn your meal into a cold struggle. Here’s what you need to keep hot chow on the menu and spirits high in the snow.
Reliable Camp Stoves Built for Cold Weather
The wrong stove can leave you hungry and frustrated. In freezing conditions, liquid-fuel stoves (like white gas models) outperform most canister stoves, which can sputter when temps drop below freezing. Multi-fuel stoves are even better if you want maximum versatility. Make sure your stove is field-tested for sub-zero use and easy to maintain with gloved hands.
Camp Stove Comparison Table
| Stove Type | Pros | Cons |
|---|---|---|
| Liquid-Fuel (White Gas) | Reliable in extreme cold, easy to refill | Heavier, requires priming |
| Canister Stove | Lightweight, quick setup | Poor performance below 20°F/-6°C, hard to find winter fuel mix |
| Multi-Fuel Stove | Versatile, works with several fuels | Bulkier, learning curve for operation |
Fuel Types: What You Need to Know
For deep winter trips, white gas is king—its less likely to freeze or lose pressure. Butane/propane mixes found in standard canisters often fail in the cold unless you get a specific “winter blend.” Always bring extra fuel; melting snow for water uses more than you think.
Insulated Cookware: Keep It Hot, Not Frozen
An insulated pot or cozy keeps food warm longer and saves fuel by reducing heat loss. Titanium pots are lightweight but not as insulating; consider adding a DIY foam sleeve. Don’t forget long-handled spoons—they keep your gloves out of the mess.
Recommended Cookware Features Table
| Feature | Description |
|---|---|
| Insulated Pot Sleeve | Keeps meals hotter, doubles as hand protection from metal pots |
| Tight-Fitting Lid | Cuts down cook time and conserves fuel |
| Nesting Design | Saves pack space and keeps gear organized |
Freeze-Proof Food Storage Solutions
Your trail meals are useless if they’re frozen solid. Use insulated food containers or stash meals inside your sleeping bag overnight to keep them edible. Vacuum-sealed bags work well for pre-cooked meals—just boil water and drop the bag in for a fast, hot dinner.
Pro Tip:
Tuck energy bars and snacks inside an inner pocket or close to your body during the day so they stay soft enough to eat on the move.
5. Essential Navigation and Safety Tools
When winter camping, losing your way or facing an emergency can quickly turn a fun adventure into a risky situation. That’s why it’s crucial to pack the right navigation and safety gear before heading out into the wild. First, never underestimate the power of a reliable map and compass—even if you’re tech-savvy, batteries die fast in cold weather and electronics can fail. For added security, bring a GPS device designed for backcountry use; these units offer precise location tracking, even in snowy forests or under cloud cover.
Next up, always include a quality headlamp with extra batteries. Winter days are short and nights are long; you’ll need dependable hands-free lighting for setting up camp after dark or finding your way on an early morning hike. For remote destinations where cell service is nonexistent, a satellite messenger is a game-changer. These devices let you send check-in messages or SOS alerts to loved ones or rescue teams—peace of mind you can’t put a price on.
No checklist is complete without a basic first-aid kit tailored for cold-weather emergencies. Stock it with essentials like bandages, antiseptic wipes, blister care, thermal blankets, hand warmers, and any personal medications you might need. Accidents can happen fast when temperatures drop, so being prepared means you can handle frostbite, hypothermia, or minor injuries until help arrives. With these must-have tools in your pack, you’ll be ready to face whatever Old Man Winter throws your way—and come home safe with epic stories to tell.
6. Hydration and Water Management
Staying hydrated is just as important in the winter as it is during summer camping, but subfreezing temperatures bring unique challenges. Here’s how to keep your water from turning into a block of ice and ensure you always have access to drinkable water.
Preventing Frozen Water
Don’t let your hydration system fail you in the cold. Carry water bottles inside your backpack or sleeping bag to keep them insulated with your body heat. Store water bottles upside down; ice forms at the top, so if the bottom freezes first, you’ll still be able to access liquid water when you flip it upright. Avoid leaving bottles exposed to the elements overnight.
Use Insulated Bottles
Double-walled vacuum-insulated bottles are worth every penny for winter camping. They help prevent freezing and keep hot beverages warm for hours. For extra security, wrap bottles in wool socks or use specialized bottle insulators. Avoid using hydration bladders unless they’re rated for extreme cold—hoses and mouthpieces freeze fast.
Melting Snow Efficiently
If you run out of liquid water, melting snow becomes your lifeline. Always pack a reliable stove with plenty of fuel—melting snow requires more fuel than boiling liquid water. Use a wide pot for greater surface area, and start by adding a small amount of liquid water before adding snow; this helps melt snow faster and prevents scorching your pot. Never eat snow directly—it lowers your core temperature and can put you at risk of hypothermia.
Essential Gear Checklist for Water Management
- Insulated stainless steel or double-walled bottles
- Water bottle insulators or wool socks
- Backcountry stove with windscreen and extra fuel
- Wide-mouth pots for melting snow
- Reliable lighter and waterproof matches
Pro Tip:
Add a pinch of electrolytes or drink mix to melted snow to improve taste and replenish minerals lost through sweat—even in cold weather, dehydration sneaks up quickly. Smart hydration keeps you sharp, safe, and ready for any winter adventure.