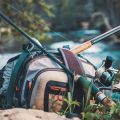
1. Choosing the Right Dutch Oven
If youre planning to cook outdoors with a Dutch oven, choosing the right one can make all the difference. Whether youre whipping up a hearty stew at your campsite or baking fresh biscuits in the backcountry, youll want to consider size, material, and special features that suit your outdoor lifestyle.
Sizes: Picking What Fits Your Needs
Dutch ovens come in various sizes, typically measured in quarts. Heres a quick guide to help you choose:
| Size (Quarts) | Servings | Best For |
|---|---|---|
| 2-4 qt | 1-2 people | Side dishes, small meals |
| 5-6 qt | 3-4 people | Main courses, stews, chili |
| 7-9 qt | 5-7 people | Large family meals, group camping |
Materials: Cast Iron vs. Aluminum
The two most common materials for Dutch ovens are cast iron and aluminum. Each has its pros and cons:
| Material | Pros | Cons |
|---|---|---|
| Cast Iron | Excellent heat retention, durable, ideal for slow cooking | Heavy, requires seasoning and maintenance |
| Aluminum | Lighter weight, heats up quickly, rust-resistant | Poor heat retention, can warp over open flame if not thick enough |
Key Features to Look For
Lid Design
A flat lid with a lip is great for holding hot coals on top—perfect for baking or roasting. Some lids can even double as a griddle when flipped over.
Legs or No Legs?
Dutch ovens with legs are designed to sit directly over coals without tipping. If you plan to cook on a grill or stove top too, go for a flat-bottom model without legs.
Wire Handle (Bail Handle)
A sturdy wire handle makes it easier to move your Dutch oven on and off the fire or hang it from a tripod for suspended cooking.
Pro Tip:
If youre just starting out, a 6-quart cast iron Dutch oven with legs and a flanged lid is a solid all-around choice for most campfire cooking situations.
Selecting the right Dutch oven is the first step toward delicious meals under the stars. With the right size, material, and features in hand, youre ready to bring your favorite recipes into the great outdoors.
2. Fuel Sources and Heat Control
When youre cooking with a Dutch oven in the great outdoors, choosing the right fuel source and knowing how to manage heat are key to success. Whether youre grilling up breakfast at a campsite or slow-cooking dinner during a road trip, understanding your options will help you get perfectly cooked meals every time.
Charcoal Briquettes
Charcoal briquettes are one of the most popular fuel sources for Dutch oven cooking. They’re consistent, easy to transport, and allow for precise temperature control. A general rule of thumb is to use about twice as many briquettes as the diameter of your Dutch oven—for example, 24 briquettes for a 12-inch pot.
Heat Placement Tips:
| Cooking Style | Briquettes on Top | Briquettes Underneath |
|---|---|---|
| Baking (e.g., cakes, bread) | 16 | 8 |
| Roasting (e.g., chicken, potatoes) | 12 | 12 |
| Simmering or Stewing | 8 | 16 |
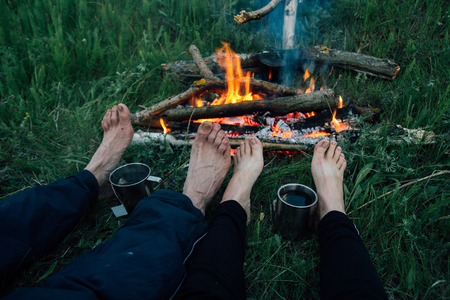
Campfires
If youre going old-school with a campfire, it’s all about managing hot coals. Wait until the fire dies down and youre left with glowing embers before placing your Dutch oven. Avoid placing it directly over flames—this can cause uneven heating and burn your food.
Campfire Cooking Tips:
- Create a coal bed with even thickness for stable heat.
- Use a shovel or tongs to move coals under and around the oven.
- Add fresh wood sparingly to maintain consistent heat.
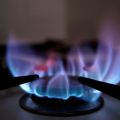
Propane Burners
For quick setup and reliable heat, propane burners are a favorite among campers who don’t want to fuss with firewood or charcoal. Just be sure to use a burner that provides good flame control and a sturdy surface for your Dutch oven.
Why Choose Propane:
- Fast heating with adjustable flame levels.
- No need to wait for coals or embers.
- Easier to use in areas where open fires are restricted.
Quick Heat Control Tips:
- Always preheat your Dutch oven before adding ingredients.
- If using charcoal, rotate the lid and pot every 15 minutes for even cooking.
- Use wind screens when necessary to avoid losing heat outdoors.
No matter which fuel source you choose, mastering heat control will elevate your outdoor Dutch oven game. With some practice and the right tools, youll be serving up perfectly cooked meals wherever adventure takes you!
![]()
3. Essential Cooking Tools
When youre cooking with a Dutch oven on the go, having the right tools makes all the difference. These must-have utensils not only make your outdoor cooking more efficient but also keep you safe around hot coals and cast iron.
Lid Lifters
A lid lifter is a game changer when handling a hot Dutch oven. It allows you to safely lift the heavy, hot lid without getting too close to the heat. Many models come with long handles and a hook or clamp mechanism for better control.
Tripods and Cooking Stands
Cooking over an open fire? A sturdy tripod or cooking stand lets you suspend your Dutch oven above the flames at just the right height. Adjustable chains help manage heat levels, making it easier to simmer, boil, or bake outdoors.
Long-Handled Tongs
Managing hot coals is part of Dutch oven cooking, and long-handled tongs help you move briquettes or wood embers safely and precisely. Look for tongs that are at least 16 inches long and made from durable stainless steel.
Heat-Resistant Gloves
Never underestimate how hot a Dutch oven can get. Heat-resistant gloves protect your hands while lifting lids, moving pots, or adjusting coals. Opt for gloves rated for high temperatures (500°F or more) and made from materials like leather or silicone.
Quick Comparison of Essential Tools
| Tool | Main Purpose | Recommended Features |
|---|---|---|
| Lid Lifter | Safely lift hot Dutch oven lids | Long handle, secure grip design |
| Tripod/Stand | Hang Dutch oven over open fire | Adjustable chain, stable frame |
| Long-Handled Tongs | Move coals safely and precisely | 16”+ length, heat-resistant metal |
| Heat-Resistant Gloves | Protect hands from high temperatures | 500°F+ rating, leather or silicone material |
Tip:
If youre just starting out with Dutch oven cooking, consider buying a pre-packed campfire cooking tool kit that includes most of these essentials—it’s a great way to save money and stay organized.
4. Prep and Cleanup Gear
Cooking with a Dutch oven while camping can be incredibly rewarding, but having the right prep and cleanup tools makes everything smoother. Whether youre chopping veggies or cleaning up after a hearty meal, a few smart gear choices can save you time and hassle. Here are some must-have items that will help keep your camp kitchen organized and efficient.
Meal Prep Essentials
Prepping meals outdoors doesnt have to be messy or complicated. With the right tools, you can set up a functional cooking station just about anywhere.
| Item | Why Its Useful |
|---|---|
| Cutting Boards (Preferably Foldable or Compact) | Provides a clean, sturdy surface for food prep without taking up much space in your gear. |
| Sharp Camping Knife with Sheath | A good quality knife is essential for prepping meats and veggies quickly and safely. |
| Stackable Storage Containers | Great for organizing chopped ingredients or storing leftovers; look for BPA-free options with tight lids. |
Cleanup Made Easy
Nobody loves doing dishes at camp, but it doesn’t have to be a chore. With a few clever tools, you can wrap up your meal and get back to enjoying the outdoors faster.
| Item | Why Its Useful |
|---|---|
| Collapsible Sink or Wash Basin | Saves space when packed but expands to hold water for washing dishes or rinsing ingredients. |
| Biodegradable Soap | Keeps your cookware clean without harming the environment — perfect for Leave No Trace camping. |
| Scrub Brush or Sponge with Handle | Makes it easier to clean cast iron surfaces without damaging them; look for brushes with built-in soap dispensers for added convenience. |
Pro Tip:
Designate one storage container specifically for dirty dishes to keep them separate from clean items until youre ready to wash them. It helps maintain hygiene and keeps your campsite tidy.
Keep It All Together
A dedicated tote or bin to store all your prep and cleanup gear will make packing easier and ensure nothing gets left behind. Label it clearly so you can grab it quickly when its time to cook or clean up.
Your Camp Kitchen MVPs
Having these items on hand not only streamlines your Dutch oven cooking setup but also makes the whole experience more enjoyable. When youre well-prepared, its easier to focus on creating delicious meals under the open sky.
5. Storage and Transport Solutions
When youre heading out on an adventure—whether its off-roading, hiking into a backcountry campsite, or hitting the road in your RV—keeping your Dutch oven gear organized and protected is key. A Dutch oven is built tough, but it’s heavy and can easily damage other gear if not stored properly. Here are some practical tips and tools to help you pack smart and travel light without sacrificing your camp cooking setup.
Choosing the Right Storage Containers
Heavy-duty storage bins with locking lids are a great way to keep everything together. Look for containers that are weather-resistant and stackable to make packing easier. Soft-sided gear bags made specifically for Dutch ovens can also be useful, especially those with padded sides and reinforced bottoms.
Recommended Storage Options
| Storage Type | Best For | Pros | Cons |
|---|---|---|---|
| Hard Plastic Bin | RV kitchens, car camping | Durable, stackable, protects other gear | Bulky, not ideal for hiking |
| Padded Dutch Oven Carry Bag | Hiking to campsite, short walks from vehicle | Lighter weight, easy to carry, protective padding | Less structure than hard bins |
| Canvas Utility Tote | Quick trips, off-road setups | Flexible size, easy to store when empty | No protection from impact or moisture |
Packing Tips to Protect Your Gear
- Cushion cast iron: Use old towels or silicone mats between the lid and base to prevent chipping during transport.
- Avoid moisture: Make sure your Dutch oven is completely dry before packing it away to prevent rust.
- Separate tools: Store utensils like lid lifters, gloves, and tripods in their own small bag or pouch to avoid scratches and clutter.
- Label your gear: Especially helpful in group camps or RVs where multiple people are sharing kitchen space.
On-the-Go Carrying Solutions
If youre hiking into a site with limited access by vehicle, consider distributing the load across backpacks. The Dutch oven itself can go in a dedicated carry bag with backpack straps or be carried separately using a padded handle wrap. Keep lighter accessories like seasoning oil, parchment liners, or fire starters in another pack to balance the weight.
Pro Tip:
Add a small microfiber cloth inside your storage container—great for quick cleanups and wiping down gear before repacking.
With a little planning and the right gear storage setup, youll spend less time digging through boxes and more time enjoying meals around the campfire.
6. Must-Have Accessories for Versatility
To truly unlock the full potential of Dutch oven cooking while youre camping or on the go, its important to pack a few key accessories. These tools not only make your cooking experience easier but also allow you to try a wider range of recipes—from baking bread to slow-roasting meats. Here are some must-have items that can take your outdoor meals to the next level.
Trivets
Trivets are small metal stands that elevate your Dutch oven off direct heat. This helps control temperature and prevents burning when simmering stews or slow-cooking dishes. You can place them inside the oven too, creating a platform for baking items like cakes or casseroles without scorching the bottom.
Liners
Using liners—either parchment paper, foil, or reusable silicone—can make cleanup a breeze. They’re especially useful when cooking sticky or cheesy foods, like cobblers or lasagna. Liners also help maintain the seasoning on your cast iron by minimizing direct food contact.
Baking Racks
Baking racks fit inside your Dutch oven and lift food off the base. This allows for even air circulation, which is great for roasting meat or baking items like biscuits and cookies. It’s also helpful for keeping items warm without overcooking them.
Accessory Comparison Table
| Accessory | Main Use | Why It Matters |
|---|---|---|
| Trivet | Heat control & elevation | Prevents burning and enables layered cooking |
| Liner | Easy cleanup & protection | Keeps food from sticking and protects seasoning |
| Baking Rack | Even cooking & roasting | Improves air flow and texture in baked goods |
Other Handy Add-Ons
- Lid lifter: Essential for safely removing hot lids.
- Thermometer: Helps monitor internal temps for perfect doneness.
- Charcoal chimney starter: Speeds up coal lighting without lighter fluid.
Packing these accessories will give you more flexibility with what you can cook outdoors—and ensure every meal is as good as one made in your home kitchen.