Understanding Low Visibility Challenges
If you’ve ever tried to navigate through thick fog, pitch-black night, or a heavy snowstorm, you know just how quickly things can get confusing. These aren’t just minor inconveniences—they’re real challenges that can turn a simple camping trip or hike into a risky situation if you’re not ready for them.
What Makes Low Visibility So Dangerous?
When you can’t see your surroundings clearly, your sense of direction gets thrown off fast. The trail markers disappear, shadows play tricks on your eyes, and even familiar landmarks seem to vanish. Add in the cold or damp from fog and snow, and it’s easy to make mistakes that could put you in harm’s way.
Main Hazards in Low Visibility Situations
| Condition | Main Hazards | Disorientation Risks |
|---|---|---|
| Fog | Reduced depth perception, wet surfaces, hidden obstacles | Losing the trail, circling back on yourself, walking off ledges |
| Night | Total darkness, limited field of view, wildlife surprises | Mistaking paths, tripping over roots or rocks, panic from noises |
| Snow | Whiteouts, covered landmarks, slippery terrain | Losing all visual cues, wandering off course, hypothermia risks |
Why Preparation Matters in American Wilderness Settings
The vast forests, national parks, and wild spaces across the U.S. mean that getting lost isn’t just an inconvenience—it can be life-threatening. In places like Yosemite or the Rockies, rescue teams might take hours (or longer) to reach you if you wander off course. That’s why understanding these hazards and prepping ahead—like packing navigation tools and letting someone know your route—isn’t just smart. It’s essential for anyone serious about outdoor adventures.
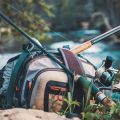
2. Essential Gear for Safe Navigation
Breakdown of Must-Have Tools for Low Visibility Camping
When you’re out camping in the U.S.—whether it’s dense fog, a moonless night, or snow coming down hard—having the right gear isn’t just about comfort. It’s about making sure you can always find your way back to camp or safety. Here’s a breakdown of the essential navigation tools and clothing you’ll need to handle low visibility like a pro.
Navigation Tools Every Camper Needs
| Gear | Why You Need It | Tips for Use in the U.S. |
|---|---|---|
| Reliable Compass | Works when GPS fails; crucial for orientation in forests or mountains. | Choose models with glow-in-the-dark markings; practice with local maps before your trip. |
| GPS Device | Keeps track of your route even in total whiteout or darkness. | Preload U.S. topographical maps; bring extra batteries or a power bank, especially for multi-day trips. |
| Headlamp (with extra batteries) | Keeps your hands free while lighting your path at night or in thick fog. | Opt for a headlamp with a red light mode to protect night vision; check that it meets IPX water-resistance ratings for wet U.S. conditions. |
| Retroreflective Markers | Makes trails or campsites easy to spot in the dark or snow using flashlight/headlamp beams. | Tie them on trees, tent lines, or gear; they’re especially useful in snowy forests and popular in American winter campsites. |
Layered Cold-Weather Clothing for U.S. Conditions
Dressing right is just as important as navigation gear when visibility drops and temperatures follow. The U.S. has wildly different climates—from Pacific Northwest rain to Rocky Mountain snowstorms—so layering is key.
Layering System Breakdown:
| Layer Type | Purpose | U.S.-Specific Tips |
|---|---|---|
| Base Layer (Moisture-Wicking) | Keeps sweat off your skin to prevent chills. | Synthetic or merino wool works best—skip cotton, especially in humid East Coast regions. |
| Insulation Layer (Fleece/Down) | Traps body heat so you stay warm even if temps drop fast. | Puffy jackets are great for cold Midwest nights; fleece is versatile in variable climates like California’s Sierras. |
| Outer Shell (Waterproof/Breathable) | Shields against wind, rain, and snow—essential for sudden weather changes. | Select shells rated for both wind and water resistance; look for pit zips if hiking in warmer Southern states where storms roll through quick. |
Packing Checklist: Don’t Leave Home Without These Essentials!
- Compass (glow-in-the-dark preferred)
- GPS device with preloaded local maps and spare batteries/power bank
- Quality headlamp plus backup batteries
- Retroreflective trail markers or tape rolls
- Full layering system: base, insulation, and shell layers tailored to your destination’s climate
- Duct tape (for quick fixes)
- Laminated map of your area (always have analog backup!)
No matter where you camp in the States—Appalachian fog, Alaskan snowfields, or Arizona desert nights—this essential gear keeps you safe and on track when visibility drops to zero. Stay sharp, stay prepared, and let the adventure continue!

3. Practical Navigation Techniques
Pacing: Count Your Steps, Keep Your Bearings
When fog, darkness, or snow reduces visibility, your feet become your best navigation tool. Pacing means counting your steps to estimate distance—an old-school but reliable trick used by American hikers and search-and-rescue teams.
How to Pace Like a Pro
- Measure how many steps it takes you to walk 100 feet on flat ground.
- Use this number to estimate distances in the field. For example, if 60 paces = 100 feet, then 300 paces ≈ 500 feet.
- Mark milestones in your head or jot them down on a pocket notebook as you go.
Map-to-Terrain Matching: Read the Land Like a Local
Even if you can’t see far, matching your map to what’s underfoot keeps you oriented. American wilderness areas often have distinct features like ridges, valleys, streams, or tree lines—use them!
| Map Feature | What to Look for Outdoors |
|---|---|
| Ridges/Hills | Feeling elevation changes underfoot, even if you can’t see them |
| Streams/Lakes | Listen for running water or soft ground near banks |
| Trail Junctions | Slight clearings or changes in trail surface |
| Tree Lines/Open Fields | A sudden change in wind or crunch of snow under boots |
Using Natural and Artificial Markers: Stay on Track in Any Condition
Navigators in the U.S. backcountry rely on both natural markers (like large rocks, unique trees) and artificial ones (trail blazes, reflectors). These are lifesavers when everything looks the same in the dark or snow.
Marker Strategies
- Natural: Look for oddly shaped trees (lightning scars, twisted trunks), clusters of boulders, or animal tracks that follow a consistent path.
- Artificial: Follow colored trail blazes painted on trees (common in U.S. state parks), reflective tags, cairns (rock piles), or even survey ribbons tied to branches.
- If heading off-trail, leave a marker for yourself every so often—bright bandanas or glow sticks work great and are easy to spot with a flashlight.
Special Tips for Snowy or Wooded American Landscapes
- Snow: Deep snow can hide trails and landmarks. Use trekking poles to probe for hard-packed trail beneath powder. In national forests, look for ski tracks or snowmobile paths—they often follow established routes.
- Trees: Dense woods can make you lose direction quickly. Use compass bearings and count steps between distinct tree clusters. If you circle a tree twice—stop! Recheck your bearing and adjust.
- Northern U.S.: Moss grows thicker on the north side of trees—handy when compasses freeze up.
- No Trail? In emergencies, stick to contour lines (side-hilling) instead of going straight downhill—it’s safer and easier to keep track of where you are.
Your Action Plan for Low Visibility Navigation
- Pace out distances and mark progress mentally or with notes.
- Match your map features to terrain—use all senses, not just sight.
- Spot and use both natural and artificial markers along your route.
- Adapt methods for snowy/wooded conditions: probe snow, watch tree patterns, and trust local signs like moss direction.
4. Group and Solo Strategies
Best Practices for Staying Safe Together
When visibility drops—whether you’re lost in the fog, hiking at night, or battling a whiteout in the backcountry—sticking together becomes more important than ever. Here’s how to keep your crew safe and accounted for with tried-and-true American outdoor tactics.
Buddy System: Never Go Alone
The classic buddy system is non-negotiable when you can’t see far ahead. Always pair up so each person looks out for the other. This way, if someone slips, gets disoriented, or has an emergency, help is right there. Make it a habit to do regular headcounts before moving on.
Rope Lines: Stay Connected
In thick fog or blinding snow, a rope line can be a literal lifeline. Tie everyone together with about 6-10 feet of slack between each person. That’s close enough to stay together but with enough space to move safely over rough terrain. Rope lines are especially useful for crossing open snowfields, dense woods, or icy ground where visibility is next to zero.
| Method | When to Use | Main Benefit |
|---|---|---|
| Buddy System | Any low visibility situation | Immediate assistance in emergencies |
| Rope Line | Heavy fog, snowstorms, night hikes | Keeps group physically connected |
| Check-Ins | Rest stops or route changes | Makes sure no one is missing or injured |
| Whistle Codes | If separated by distance or obstacles | Quick communication without shouting |
Regular Check-Ins: Don’t Skip Them!
No matter your method—whether you’re hiking a trail or setting camp—schedule regular check-ins. Pause every 15-30 minutes for a quick roll call and gear check. In challenging conditions, these breaks are also a chance to warm up, hydrate, and make sure everyone’s in good shape.
Whistle Codes: Simple and Loud Communication
A whistle travels farther than your voice and cuts through wind or snow. Before heading out, agree on basic whistle codes:
- One blast: Stop and listen (freeze in place)
- Two blasts: Come here/regroup
- Three blasts: Emergency! Need help ASAP!
If You’re Solo: Extra Precautions Matter
Navigating alone in poor visibility? It’s riskier, but sometimes unavoidable. Leave your plan with someone back home, carry extra batteries for your headlamp and GPS, and set up “check-in” times via satellite communicator if possible. Always slow down—rushing leads to mistakes when you can’t see clearly.
5. Emergency Protocols and Rescue Signals
How to Respond if Lost or in Distress
If you find yourself lost or in trouble while camping in low visibility—whether it’s thick fog, deep night, or a snowstorm—staying calm and taking the right steps can make all the difference. Here’s what to do:
Setting Up Visible Signals
The first priority is making yourself easy to spot by rescuers. Use whatever materials you have to create clear, visible signals:
| Signal Type | How to Use It | Best Materials |
|---|---|---|
| Bright Colors | Lay out jackets, tarps, or gear in open areas | Neon clothing, emergency blankets |
| Light Signals | Flashlights or headlamps flashed in groups of three (universal SOS signal) | LED flashlights, lanterns |
| Smoke/Fire | Create a smoky fire if possible; three fires in a triangle is an international distress symbol | Dry wood, pine needles, matches/lighter |
| Whistle Blasts | Three loud blasts at regular intervals means help needed | Loud whistle (always carry one!) |
| Ground Symbols | Create large X or SOS shapes in snow or dirt for aerial searchers to see | Rocks, branches, packed snow/dirt |
Understanding Local Emergency Communication Standards
Your cell phone may not always work off-grid, but knowing local protocols can save time and lives. In the U.S., here’s what you should know:
- Call 911: If you have reception, call 911 and give your location as accurately as possible. Know landmarks or GPS coordinates.
- Texting 911: Some counties allow texting 911 when voice calls aren’t possible. Try sending your emergency and location details.
- PLBs & Satellite Messengers: Personal Locator Beacons (PLBs) or devices like Garmin inReach let you send SOS signals even without cell service. Activate only for true emergencies.
- Stay Put After Calling for Help: Unless you’re in immediate danger, stay where you are so rescuers can find you.
Your Survival Priorities: S.T.O.P.
If you’re lost, remember the S.T.O.P. method used by American outdoor pros:
- S = Stop: Pause and take a breath. Don’t wander aimlessly.
- T = Think: Assess your situation—weather, supplies, physical condition.
- O = Observe: Look for safe shelter options, water sources, and natural hazards.
- P = Plan: Decide how to signal for help and conserve energy. Only move if it’s safer than staying put.
Pocket Checklist: What To Do If Lost in Low Visibility Camping Conditions
- Create visible signals using bright colors or light sources.
- If night falls or weather worsens, build a fire for warmth and signaling.
- If you have a whistle, use three blasts repeatedly.
- If you must move for safety (like avoiding hypothermia), mark your path with visible objects.
- If able to communicate electronically (phone/PLB), send your exact location and stay put unless directed otherwise by rescuers.
- Shelter in place if possible; protect yourself from wind and moisture until help arrives.
Stay prepared with the right knowledge and gear—your best chance of getting found fast is being ready before you even need these skills!
6. Real-World Scenarios and Field Tips
Case Studies: U.S. National Parks & Wildlands
Yosemite National Park – Foggy Mornings in the Valley
Imagine you wake up to a thick blanket of fog in Yosemite Valley, with visibility down to just a few feet. Trail markers disappear into the mist. In these conditions, experienced hikers rely on key skills:
- Stay Put or Move Slow: If youre unsure of your location, stay put until visibility improves. If you must move, go slow and mark your route (tie a bandana or use GPS breadcrumbs).
- Use Landmarks: Listen for sounds like rivers or waterfalls that can help orient you when you cant see far.
Grand Teton National Park – Navigating at Night
You’re caught out after dark on the Cascade Canyon Trail. The stars are bright, but the path is hard to follow.
- Red Headlamp Mode: Use a headlamp with a red light setting to protect your night vision and avoid blinding your hiking partners.
- Pace Counting: Count your steps between known trail markers if you can’t see signs easily.
Rocky Mountain National Park – Heavy Snowfall
A surprise snowstorm has covered all visible trails and landmarks.
- Backtrack Carefully: Your outgoing footprints may fill in quickly. Carry a compass and know your bearing before leaving camp.
- Shelter Strategy: In deep snow, dig a quick snow trench or use natural features as windbreaks if you need to stop and regroup.
Pro-Level Adaptation Tips When Nature Throws a Curveball
| Situation | What Pros Do |
|---|---|
| Trail disappears in fog or snow | Use GPS waypoints set ahead of time; flag your route with bright tape if off-trail |
| Caught out after dark unexpectedly | Switch to low-beam headlamp, walk single file, check bearings often |
| No visible landmarks anywhere | Sit tight, signal for help if needed (whistle, reflective gear), ration energy and warmth |
| Mismatched map & terrain due to changing weather | Rely on backup navigation (compass + GPS); compare elevation features by feel/altimeter readings |
Your Go-To Field Checklist for Low Visibility Navigation
- Carry extra batteries for lights and GPS devices
- Laminated paper maps—won’t get soggy in rain or snow
- Whistle and high-vis gear for signaling rescue teams
- Pace beads or tally counters for step tracking in poor light/snow cover
- A bright bandana or trail marker tape for marking routes in whiteout or thick fog conditions
If you practice these real-world tactics, even a sudden change in weather won’t catch you off guard. Stay adaptable, keep your cool, and always respect Mother Nature’s surprises!