1. Choosing the Right Campsite
When youre heading out for a solo camping trip, picking the right campsite is key to a safe and comfortable experience—especially when youre setting up your tent by yourself. Here are some beginner-friendly tips to help you choose a spot that checks all the boxes for safety, weather protection, and ease of setup.
Look for Flat, Level Ground
A flat surface makes pitching your tent much easier and helps you get a good night’s sleep. Avoid slopes or uneven ground that can cause discomfort or water pooling if it rains. If possible, clear away sticks and rocks before setting up your tent.
Stay Close—but Not Too Close—to Water
Being near a water source like a stream or lake is convenient for cooking, cleaning, and drinking (with proper filtration). But make sure your tent is at least 200 feet away from the water to avoid unexpected flooding and protect local ecosystems.
Check Wind Direction
Pitch your tent with the narrow end facing into the wind to reduce resistance and noise. Use natural windbreaks like trees, bushes, or boulders to help shield your tent—just make sure they’re stable and won’t fall during high winds.
Use Natural Shelter
Trees and hills can offer great protection from wind and rain. However, avoid setting up directly under dead trees or branches (“widowmakers”) that could fall during a storm.
Quick Site Selection Checklist
| Consideration | Why It Matters |
|---|---|
| Flat Ground | Easier setup and better sleep comfort |
| Distance from Water (200 ft) | Reduces flood risk and follows Leave No Trace principles |
| Wind Direction | Keeps your tent stable and reduces noise |
| Natural Shelter | Adds protection from elements without extra gear |
| Avoid Dead Trees/Branches | Prevents injury or damage in storms |
Pro Tip:
If youre camping in bear country, make sure your site allows proper food storage away from your sleeping area. Solo campers should be especially mindful of wildlife safety protocols.
Selecting the right campsite sets the tone for your entire solo adventure. Take a few extra minutes to scout the area before unpacking—it’ll pay off in comfort, safety, and peace of mind.
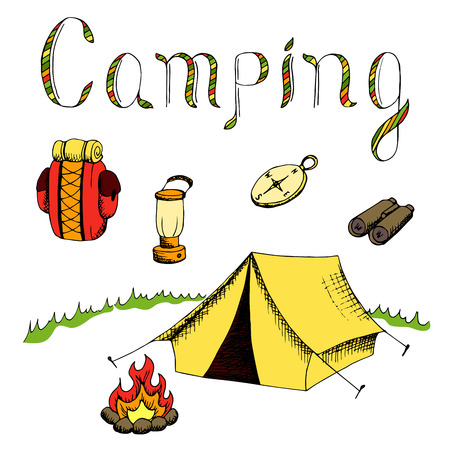
2. Essential Gear for Solo Tent Setup
When youre heading out on a solo camping trip, every piece of gear matters—especially when it comes to pitching your tent alone. Without a buddy to lend a hand, you’ll want equipment that makes the process as smooth and efficient as possible. Here’s a breakdown of the essential items you’ll need to confidently set up camp by yourself.
Freestanding Tents
Freestanding tents are a solo camper’s best friend. These tents hold their shape without needing to be staked down immediately, making them much easier to manage on your own. You can move them around to find the perfect spot before securing them in place.
Extra Stakes and Guylines
Don’t underestimate the power of extra stakes and guylines. Weather can be unpredictable, and having additional points of contact with the ground helps keep your tent stable in windy conditions. Choose lightweight but durable stakes suited for the type of terrain youll be camping on.
Headlamp or Clip-On Light
Hands-free lighting is crucial when setting up camp at dusk or in low-light areas. A reliable headlamp lets you see what youre doing while keeping both hands free to handle poles, zippers, and guy lines. Look for models with adjustable brightness and long battery life.
Lightweight Tools
Packing smart tools will save time and effort during setup. Keep your load light while still being prepared with compact versions of these helpful items:
| Tool | Purpose |
|---|---|
| Mallet or Stake Hammer | Helps drive stakes into tough ground easily |
| Multi-tool or Pocket Knife | Cuts rope, tightens screws, and handles small repairs |
| Tent Pole Repair Sleeve | Quick fix if a pole breaks during setup |
Backpack with Easy Access Compartments
Your backpack plays a big role in how quickly you can set up camp. Choose one with multiple compartments so you can reach stakes, poles, and accessories without emptying everything onto the ground.
Pro Tip:
Pack your tent last so it’s the first thing you pull out when setting up camp.
Practice Makes Perfect
No matter how good your gear is, practice setting up your tent at home before hitting the trail. Knowing how everything fits together will make solo setup faster and less stressful once youre out in nature.
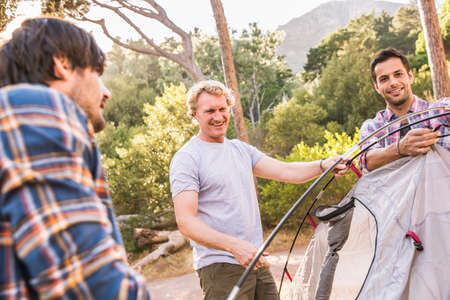
3. Step-by-Step Guide to Pitching a Tent Alone
Setting up a tent solo might sound intimidating, but with the right steps, you can have your shelter up in no time—no extra hands needed. Whether youre deep in the backcountry or just enjoying a quiet night at a local campground, mastering this skill adds confidence and freedom to your solo camping experience.
Step 1: Choose and Prepare Your Campsite
Look for a flat, dry area free of rocks, roots, or sharp debris. Avoid low spots where water can collect if it rains. Once youve found your spot, clear away any debris and lay down your footprint or ground tarp to protect the bottom of your tent.
Checklist for Site Prep:
| Task | Why It Matters |
|---|---|
| Clear debris | Prevents damage to the tent floor |
| Pick level ground | Makes sleeping more comfortable |
| Avoid low areas | Keeps you dry in case of rain |
Step 2: Unpack and Lay Out All Tent Components
Before assembling anything, unpack and identify all parts of your tent: tent body, poles, rainfly, stakes, and guylines. Laying them out helps you stay organized and ensures nothing’s missing before you begin.
Step 3: Assemble the Poles
If your tent uses shock-corded poles (most modern tents do), simply unfold them and connect each section. Set them aside in an accessible spot so they’re ready when needed.
Step 4: Stake Down One Side of the Tent Body
This is where going solo takes a bit of strategy. Start by staking down one corner of the tent body. Then move diagonally across to stake the opposite corner to keep tension on the base. This will keep the tent in place as you raise it.
Tent-Staking Tips:
- If it’s windy, stake into the wind first.
- Pound stakes at a 45° angle for better hold.
- Corners should be taut but not overly stretched.
Step 5: Insert Tent Poles into Body Sleeves or Clips
This part varies by design—some tents use sleeves, others use clips. If you’re using sleeves, thread each pole carefully through its sleeve. If using clips, attach them starting from the center and working outward for balance.
Step 6: Raise the Tent Frame Solo
This is often the trickiest part when camping alone. Here’s how to make it easier:
| Tent Type | Lifting Strategy |
|---|---|
| Dome Tent | Bend one pole into position and secure; then move to the second pole while keeping tension even. |
| Tunnel Tent | Stake one end first; then slowly lift and stake the other end while tensioning poles gently. |
| Pole-less/Inflatable Tent | Pump air into support beams gradually while positioning fabric correctly. |
Step 7: Attach Rainfly and Secure with Stakes or Velcro Tabs
Drape the rainfly over the top of your setup and align it properly with doors and ventilation openings. Use any provided Velcro tabs inside the fly to attach it to poles, then stake down its corners securely.
Step 8: Adjust Tension and Secure Guy Lines
Your final step is making sure everything’s taut and weather-ready. Tighten straps on corners and adjust guy lines so they provide solid support without pulling too hard on any single point.
Guy Line Anchoring Tips:
- Anchor guy lines at about a 45° angle from tent walls for best stability.
- If soil is loose, use rocks or logs to reinforce stakes.
- Tighten gradually—don’t overdo it or you’ll stress seams.
You’ve just pitched your tent like a seasoned solo camper! With practice, these steps become second nature—and setting up camp becomes part of the adventure itself.
4. Time-Saving Hacks and Pro Tips
Setting up a tent by yourself might seem like a challenge, but with the right tricks up your sleeve, you can make it quick and easy. Whether youre out in the woods or car camping at a national park, these simple hacks will help you pitch your tent solo like youve done it a hundred times.
Pre-Attach Your Guylines
One of the easiest ways to save time during setup is to pre-attach your guylines at home. This means youll have one less thing to worry about when you’re out in the wild. Use reflective cord so they’re easy to spot at night and avoid tripping hazards.
Use Rocks as Anchors When Ground Is Tough
Sometimes the ground is just too hard or rocky for stakes. Instead of struggling, use heavy rocks to weigh down your tent corners or guyline points. Heres a quick comparison of when to use stakes vs. rocks:
| Condition | Use Stakes | Use Rocks |
|---|---|---|
| Soft soil or grass | ✔️ | |
| Sandy or loose dirt | ✔️ (bury rocks or use sandbags) | |
| Rocky or frozen ground | ✔️ |
Your Body Is a Setup Tool Too
You don’t need an extra pair of hands—just use your body smartly! For example, sit on one side of the tent while you clip poles into place on the other side. You can also use your knees or shoulders to hold sections steady while you secure them.
Quick Tip: Use Your Backpack as a Weight
If there’s wind, place your loaded backpack inside the tent once its partially set up. It’ll help keep the structure grounded while you finish staking and securing everything.
Bonus Hack: Color-Code Your Tent Components
Add small colored tape pieces to your poles and matching spots on the tent sleeves or clips. This makes setup more intuitive and faster, especially in low light conditions.
The more you practice these solo setup tips, the more second-nature theyll become—making every solo camping trip smoother from the start.
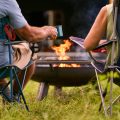
5. Weather-Proofing Your Shelter
When youre solo camping, theres no one else around to help if the weather takes a turn. That’s why prepping your tent for different conditions is key. Whether it’s gusty winds, heavy rain, or chilly nights that lead to condensation, knowing how to weather-proof your shelter will keep you safe and dry.
Staking Down for High Winds
Wind can be one of the biggest challenges when setting up camp alone. To keep your tent from turning into a kite:
- Use all stake-out points: Don’t skip any loops—manufacturers include them for a reason.
- Stake at a 45-degree angle: Point the stake away from the tent for maximum grip.
- Add guylines: Tie out guylines to secure the fly and add stability. Use nearby rocks or logs if ground is too hard for stakes.
Rainfly Adjustments for Rain
A proper rainfly setup is essential in wet weather. Heres what to do:
- Ensure full coverage: Make sure the rainfly fully covers mesh areas and doors.
- Create drip lines: Pull the rainfly taut so water runs off instead of pooling.
- Check ventilation: Even with rain protection, leave vents open to avoid stuffiness inside.
Ventilation Tips to Reduce Condensation
Condensation happens when warm air from your body meets cold tent walls. Here’s how to manage it:
| Tip | Why It Helps |
|---|---|
| Open vents or windows | Keeps air circulating and reduces moisture buildup inside |
| Avoid wet gear inside | Damp clothes increase humidity and raise condensation risk |
| Use a ground tarp properly | If it sticks out from under your tent, water can collect and seep in |
Quick Solo Setup Tips for Bad Weather
If bad weather hits while youre setting up alone, stay calm and try these quick tricks:
- Lay everything out before pitching: Know where each piece goes so you can work fast.
- Tack down corners first: This keeps your tent grounded as you build it up.
- Use your body as a windblock: Position yourself between the tent and wind while staking or clipping poles.
By preparing for the elements, youll make sure your solo camping trip stays comfortable—even when Mother Nature throws a curveball.
6. Safety and Comfort When Camping Solo
When you’re pitching a tent alone in the great outdoors, safety and comfort should always be top priorities. Being on your own means youre fully responsible for your well-being, so having solid solo camping habits can make all the difference.
Stay Safe with Smart Solo Habits
Before heading out, always let someone know where you’re going and when you plan to return. Share your itinerary with a trusted friend or family member and check in periodically if possible. It’s also smart to carry a personal locator beacon (PLB) or satellite communicator when camping in remote areas without cell service.
Essential Safety Gear Checklist
| Item | Why You Need It |
|---|---|
| First Aid Kit | For treating minor injuries quickly |
| Headlamp or Flashlight | Hands-free lighting at night |
| Whistle | To signal for help if needed |
| Multi-tool or Knife | Useful for repairs, food prep, and emergencies |
| Bear Spray (if applicable) | Certain regions require wildlife protection gear |
| Firestarter Kit | Essential for warmth and cooking |
Nighttime Preparedness Tips
Nights alone in the wild can feel intimidating, but being prepared helps ease that anxiety. Set up camp before sunset so you’re not fumbling around in the dark. Keep essentials like your headlamp, water bottle, and bear spray within arm’s reach inside your tent. And always zip up your tent to keep bugs and critters out.
Campsite Organization for Comfort and Efficiency
A tidy campsite is not just nice—it’s safer too. Organize your gear so everything has its place. Keep cooking areas away from your sleeping space to avoid attracting animals. Store food in a bear-proof container or hang it from a tree if youre in bear country.
Simple Campsite Setup Plan
| Area | Purpose |
|---|---|
| Tent Zone | Your rest area—keep it clean and dry |
| Cooking Zone (at least 200 ft from tent) | Away from sleeping area to reduce scent trails |
| Gear Storage Zone | Keep tools and supplies organized for easy access |
| Food Storage Area (bear-safe) | Prevents wildlife encounters; use canisters or hanging methods as needed |
Staying Connected Off the Grid
If youre camping far from civilization, staying connected can be challenging—but not impossible. Devices like Garmin inReach or SPOT messengers allow you to send GPS coordinates and short messages even without cell reception. These tools also have SOS features that alert emergency responders if something goes wrong.
Pro Tip:
If youre near civilization, even a quick daily text check-in lets loved ones know youre okay—and gives peace of mind on both sides.
No matter how remote your adventure takes you, these safety and comfort strategies will help ensure that solo camping stays fun, manageable, and memorable.