1. Understanding the Importance of Clean Water in the Wilderness
When youre deep in the backcountry, far from any tap or store, clean drinking water becomes more than just a convenience—it’s essential for survival. Whether you’re a weekend warrior or a hardcore survivalist, understanding why safe water matters is the first step to staying healthy and alive in remote camping situations.
Why Safe Drinking Water Is Critical
Your body can survive for weeks without food, but only a few days without water. Dehydration sets in quickly, especially when hiking, setting up camp, or facing extreme temperatures. Beyond that, drinking untreated water from natural sources like rivers, lakes, or streams can expose you to harmful microorganisms that cause serious illness.
Common Waterborne Pathogens Found in the Wild
Even if a stream looks crystal clear, it might be crawling with invisible threats. Heres a quick breakdown of common pathogens and what they can do:
| Pathogen | Type | Common Sources | Symptoms |
|---|---|---|---|
| Giardia lamblia | Parasite | Streams, lakes (especially near animal activity) | Diarrhea, cramps, nausea |
| Cryptosporidium | Parasite | Contaminated surface water | Watery diarrhea, stomach pain |
| E. coli | Bacteria | Animal feces contamination | Severe stomach cramps, vomiting |
| Norovirus | Virus | Poor hygiene or contaminated water | Nausea, diarrhea, fever |
The Dangers of Dehydration While Camping Remotely
Lack of access to clean drinking water doesn’t just make you thirsty—it can be life-threatening. When your body loses more fluids than it takes in, dehydration starts to affect your energy levels, cognitive function, and overall performance. In survival scenarios, this could mean making poor decisions or being unable to complete physically demanding tasks.
Signs of Mild to Severe Dehydration:
- Mild: Dry mouth, headache, fatigue
- Moderate: Dizziness, rapid heartbeat, irritability
- Severe: Confusion, lack of sweating, unconsciousness (requires immediate medical attention)
A Survivalists Golden Rule: Treat All Natural Water Sources Before Drinking!
No matter how clean it looks or how fresh it smells—always treat water before consuming it while camping in remote areas. This mindset keeps you protected from illness and helps ensure your outdoor adventure remains safe and enjoyable.
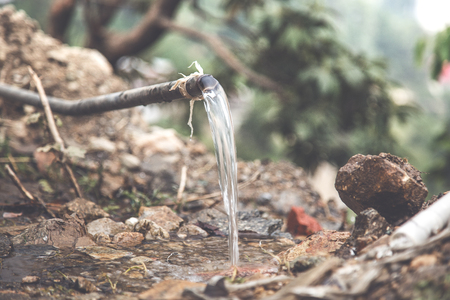
2. Identifying Natural Water Sources in Remote Areas
When youre deep in the backcountry, finding a reliable water source is one of your top priorities. Whether youre a seasoned survivalist or just getting started with remote camping, knowing how to locate and assess natural water sources can make all the difference. Here are some of the most common types of natural water sources you can look for, along with tips on evaluating their potential quality.
Common Natural Water Sources
| Water Source | Description | Pros | Cons |
|---|---|---|---|
| Rivers & Streams | Flowing bodies of water, often found in valleys or near mountainous areas. | Usually fresh; flowing water reduces stagnation. | Can still carry bacteria, parasites, or runoff from upstream. |
| Lakes & Ponds | Still bodies of freshwater; size and depth can vary greatly. | Often easy to access; usually has ample supply. | Stagnant water may harbor more contaminants. |
| Rainwater | Collected during rainfall using tarps, containers, or natural depressions. | Typically clean if collected properly; no need to find a body of water. | Sporadic availability; requires preparation to collect effectively. |
| Snow & Ice | Solid water forms found in colder climates or higher elevations. | Accessible during winter months; relatively pure when melted properly. | Melting takes time and fuel; risk of contamination if near animal activity. |
How to Locate Water Sources in the Wild
- Look for Low Terrain: Water naturally flows downhill, so valleys and low points are good places to start your search.
- Follow Animal Tracks: Wildlife tends to gather around water sources—tracks can lead you to hidden streams or ponds.
- Listen Carefully: In quiet environments, you might hear running water before you see it. Stop and listen periodically.
- Vegetation Clues: Lush greenery often indicates nearby moisture. Look for clusters of green plants or moss-covered rocks.
Evaluating Water Quality Before Collection
Not all natural water is safe to drink straight from the source. Before collecting, take a moment to assess the quality:
Sight Check
- Avoid water that looks cloudy, discolored, or has visible debris or algae blooms.
- If possible, opt for fast-moving sections of a stream instead of stagnant pools.
Smell Check
- If the water smells foul, like rotten eggs or chemicals, avoid it entirely—it could be contaminated by sulfur or industrial waste.
Taste Test (Only After Purification)
- This should only be done after purification techniques have been applied. Never taste untreated water in the wild.
Pro Tip:
If youre unsure about a source’s safety and don’t have testing kits on hand, always err on the side of caution and purify before consuming. Better safe than sorry in the backcountry!
This foundational knowledge will help you find better-quality water sources and make smarter choices when preparing your next survivalist camping trip.
3. Boiling and Heat-Based Purification Methods
When youre deep in the backcountry, far from any clean water sources, boiling is one of the most reliable and accessible ways to purify water. Its a tried-and-true method that survivalists have trusted for generations. The main goal of boiling is to kill harmful microorganisms like bacteria, viruses, and parasites that can cause serious illness.
Why Boiling Works
Boiling water kills pathogens by exposing them to high temperatures. Most disease-causing organisms die quickly at temperatures above 160°F (71°C), but bringing water to a full rolling boil ensures its safe to drink. According to the CDC, boiling water for at least 1 minute (or 3 minutes at elevations above 6,500 feet) is effective for purification.
Boiling Time Guidelines
| Elevation | Recommended Boiling Time |
|---|---|
| Sea Level to 6,500 ft | 1 Minute |
| Above 6,500 ft | 3 Minutes |
Off-Grid Heat-Based Techniques
If youre camping off-grid and don’t have access to a stove or fuel, there are still ways to use heat for water purification.
Geothermal Boiling
In some remote areas with geothermal activity—like parts of Yellowstone or Lassen Volcanic National Park—you may find natural hot springs or steam vents. While not all geothermal sources are safe (some contain toxic minerals), certain ones can be used to heat containers of water until they boil. Always research local geothermal activity before relying on this method.
Solar Boiling Techniques
Solar energy can also be harnessed to boil water. Using a solar cooker or DIY solar oven made with reflective materials like aluminum foil and glass, you can concentrate sunlight to generate enough heat to bring small quantities of water to a boil. This method takes longer—typically several hours—but it’s fuel-free and sustainable.
Tips for Solar Boiling
- Use a dark-colored pot with a lid to absorb more heat.
- Position your solar cooker in direct sunlight during peak sun hours (10am–2pm).
- Monitor the temperature using a thermometer if available—aim for at least 160°F (71°C) sustained over time.
- This method works best in sunny, warm climates; it may be ineffective on cloudy days.
No matter which heat-based method you choose, always store purified water in clean containers to avoid re-contamination. Boiling remains one of the most effective and accessible techniques for survivalist campers venturing into remote areas where clean drinking water is hard to come by.
4. Chemical Treatment Options for Water Safety
When camping in remote areas, carrying lightweight and reliable water purification methods is essential. Chemical treatments are popular among survivalists due to their portability, ease of use, and effectiveness against harmful microorganisms. Below are some of the most common chemical purifiers used in the wilderness:
Iodine Tablets
Iodine is a tried-and-true method for purifying water in backcountry settings. These tablets are compact and simple to use—just drop them into your water bottle and wait.
Pros:
- Lightweight and easy to carry
- Kills bacteria, viruses, and many protozoa
- Relatively quick (typically 30 minutes)
Cons:
- Leaves a noticeable taste
- Not recommended for pregnant women or individuals with thyroid issues
- Less effective against Cryptosporidium
Chlorine Tablets or Drops
Chlorine-based treatments, such as chlorine dioxide tablets or liquid drops, are another solid option. Theyre often favored for their effectiveness and slightly better taste compared to iodine.
Pros:
- Kills a wide range of pathogens including Giardia and Cryptosporidium (with sufficient contact time)
- No significant health concerns with occasional use
- Lighter taste than iodine
Cons:
- Takes longer—up to 4 hours for full protection against Cryptosporidium
- Sensitive to cold temperatures which can slow down the purification process
Household Bleach (Unscented)
In emergency situations, plain unscented household bleach can be used to disinfect water. Its a budget-friendly option but requires careful measurement.
Usage Instructions:
- Add 2 drops of bleach per quart (1 liter) of clear water; double if the water is cloudy.
- Stir well and let it sit for at least 30 minutes before drinking.
Pros:
- Inexpensive and widely available
- Effective against bacteria and viruses
Cons:
- Difficult to measure accurately without a dropper
- Ineffective against some protozoa like Cryptosporidium
- Chemical taste may be off-putting
Chemical Treatment Comparison Table
| Chemical Method | Effective Against | Treatment Time | Taste Impact | Best For |
|---|---|---|---|---|
| Iodine Tablets | Bacteria, Viruses, Some Protozoa (not Cryptosporidium) | 30 mins | Strong taste | Short trips, personal use |
| Chlorine Dioxide Tablets/Drops | Bacteria, Viruses, Giardia, Cryptosporidium (with longer time) | 30 mins – 4 hrs | Mild taste | Extended trips, group use |
| Unscented Bleach | Bacteria, Viruses (less effective on protozoa) | 30 mins+ | Mild to strong chemical taste depending on dose | Emergency backup option |
Chemical purifiers offer an accessible way to ensure safe drinking water while deep in the wilderness. Always read product instructions carefully and consider combining treatment methods when facing questionable water sources.
5. Portable Filtration Devices and DIY Filter Techniques
When youre deep in the backcountry, access to clean drinking water can mean the difference between a great trip and a survival situation. Thats why understanding both commercial portable filters and do-it-yourself (DIY) methods is essential for any serious survivalist camper. Lets break down your options.
Commercial Portable Water Filters
Modern water filtration devices are compact, lightweight, and designed specifically for backpackers and campers. They remove bacteria, protozoa, and sometimes even viruses depending on the model. Heres a quick look at some popular options:
| Brand/Model | Type | Weight | Main Features |
|---|---|---|---|
| Sawyer MINI | Squeeze Filter | 2 oz | Filters up to 100,000 gallons; removes bacteria & protozoa; attaches to bottles or hydration packs |
| Lifestraw Personal | Straight Straw | 2 oz | No setup required; filters 1,000 gallons; removes 99.999% of bacteria & parasites |
| Katadyn BeFree 1.0L | Squeeze Filter Bottle | 2.3 oz (without water) | Fast flow rate; easy to clean; collapsible bottle included |
| MSR Guardian Purifier | Pump Filter & Purifier | 17 oz | Pumps 2.5L/min; removes viruses, bacteria, protozoa; self-cleaning system |
| SteriPEN Ultra UV Purifier | UV Light Purifier | 4.94 oz | Kills bacteria, protozoa & viruses using UV light; rechargeable via USB; works best in clear water only |
Choosing the Right Device for Your Trip
If you’re traveling light and don’t expect heavily contaminated water sources, a Sawyer MINI or Lifestraw might be enough. For trips in areas with questionable sanitation or viral risks (like international treks), opt for the MSR Guardian or a SteriPEN paired with a pre-filter.
DIY Water Filter Techniques Using Natural Materials
If your gear fails or youre caught without a filter, knowing how to make your own from found materials could save your life. Heres one basic method using items you might find in the wild or have in your pack:
Layered Bottle Filter Method:
- You’ll need: an empty plastic bottle or similar container, cloth or bandana, charcoal (from firewood), sand, gravel/small rocks.
- Instructions:
- Cut the bottom off the bottle and flip it upside down like a funnel.
- Place cloth at the neck as the first layer to hold everything inside.
- Add crushed charcoal (helps remove chemicals and improve taste).
- Add fine sand (filters small particles).
- Add gravel or small stones on top (filters large debris).
- Pour water through slowly and collect it in a clean container.
- *Boil filtered water if possible to kill microbes.*
- Always Pre-Filter: Use a cloth or coffee filter to remove debris before purification. This helps prevent clogging filters and improves chemical treatment effectiveness.
- Boil When in Doubt: Boiling is one of the most reliable methods. Bring water to a rolling boil for at least 1 minute (3 minutes above 6,500 ft).
- Use Multiple Methods if Needed: Combine filtration and chemical treatments (like iodine or chlorine dioxide) for better protection against viruses and protozoa.
- Keep Clean Gear Separate: Don’t mix treated and untreated water containers. Cross-contamination is a common mistake.
- Label Your Bottles: Mark bottles used for purified water to avoid confusion in camp.
- Skipping Treatment Because It “Looks Clean”: Clear doesn’t mean safe. Microorganisms are invisible.
- Not Waiting Long Enough for Chemical Treatments: Follow product instructions closely—most need at least 30 minutes to work properly.
- Letting Filters Freeze: If youre camping in cold weather, keep filters in your sleeping bag overnight. Ice crystals can damage filter membranes.
- Treating Water in Dirty Containers: Always use clean bottles post-treatment. A dirty bottle can recontaminate your water instantly.
- Dug from a source with no visible contamination
- Treated using at least one reliable method (boil/filter/chemicals/UV)
- No cross-contact with untreated containers or hands
- Sufficient wait time after treatment (especially for chemicals)
Caution:
This DIY method helps reduce visible debris and may improve taste but does not guarantee removal of all pathogens like viruses or bacteria. Always boil or chemically treat water after filtering it with natural materials when possible.
Chemical Backup Options
If you don’t have a filter and boiling isn’t an option, consider carrying chemical treatments such as iodine tablets or chlorine dioxide drops as a backup. Theyre lightweight and effective against most pathogens — just be aware they take time to work and may leave an aftertaste.
Quick Comparison: Filter vs. DIY vs. Chemical Treatment
| Method | Bacteria/Protozoa Removal? | Virus Removal? | Taste Improvement? | Packing Size/Weight |
|---|---|---|---|---|
| Sawyer MINI Filter | Yes | No* | Mild improvement | Tiny/Lightweight |
| SteriPEN UV Purifier | Yes | Yes | No impact on taste unless paired with carbon filter | Pocket-sized/Medium weight |
| DIY Bottle Filter + Boiling** | If boiled, yes | If boiled, yes** | Good (charcoal helps) | N/A – uses found materials but needs heat source** |
| Iodine Tablets/Chem Drops | Yes | Yes | Poor – strong chemical taste | Tiny/lightweight backup option |
*Some filters can be paired with purifying tablets for virus protection.
**Boiling is highly recommended after DIY filtration for safety.
No matter where you camp, having more than one way to purify water gives you peace of mind—and keeps you hydrated safely in the wild.
6. Best Practices and Red Flags When Purifying Water Off-Grid
When youre out in the wild, far from any tap or store, having clean water is non-negotiable. Whether youre deep in the Rockies or tucked away in a desert canyon, knowing how to spot safe water—and avoid the bad stuff—can be the difference between a great trip and a dangerous situation. Here are some best practices and warning signs to help you purify water like a pro survivalist.
Best Practices for Safe Water Purification
Following these field-tested habits can make your water purification process safer and more effective:
Common Red Flags: How to Spot Unsafe Water
Not all natural water sources are created equal. Stay alert for these warning signs before collecting water:
| Red Flag | What It Means |
|---|---|
| Murky or discolored water | Might contain heavy sediment, organic matter, or pollution. Needs strong pre-filtration and purification. |
| Algae blooms (green scum) | Can produce harmful toxins that are tough to remove with basic methods like boiling or filtering. |
| No plant or animal life nearby | A sign that something could be off—possibly chemicals, sewage, or contamination. |
| Bad smell (sulfur, rotten eggs) | Might indicate bacterial growth or industrial pollution. Avoid if possible. |
| Stagnant water (no flow) | Higher risk of bacteria and parasites. Look for moving water when possible. |
Mistakes to Avoid When Purifying Water
Even experienced campers slip up sometimes. These common errors can put your health at risk:
Quick Tip:
If youre using UV light purifiers like SteriPEN, remember—they only work in clear water. Cloudy or dirty water blocks UV rays and makes them less effective.
Your Safety Checklist Before Drinking Wild Water:
The wilderness doesn’t hand out second chances easily. Staying alert, following proven methods, and recognizing danger signs will go a long way toward keeping you hydrated—and healthy—on your survivalist camping adventure.